


.
Scalextric Formula Junior makeover
by Phil Wicks
Having touched on this subject in a topic elsewhere on this website I decided to go a step further and see if I could get one of the Scaley Formula Junior models to drive more realistically than they ever have done! Moreover, I haven’t tried to reproduce an accurate scale model of the real car in question, but rather explore the possibility of making the Scaley car look a bit better that they do and more like a modern slotcar.
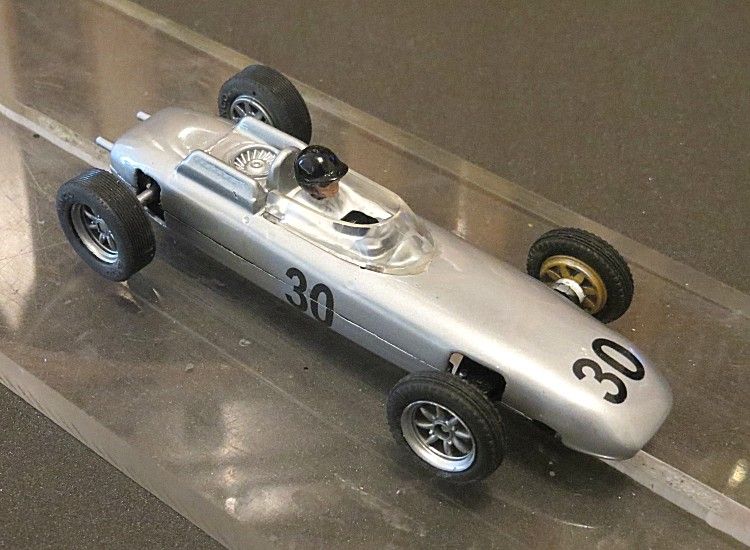
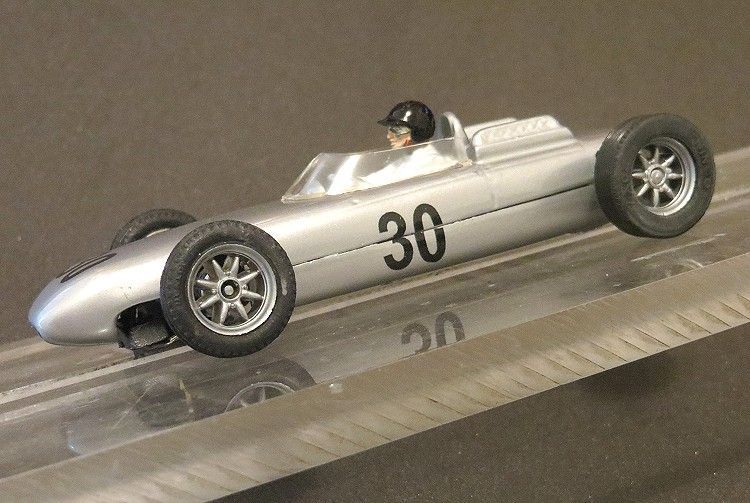
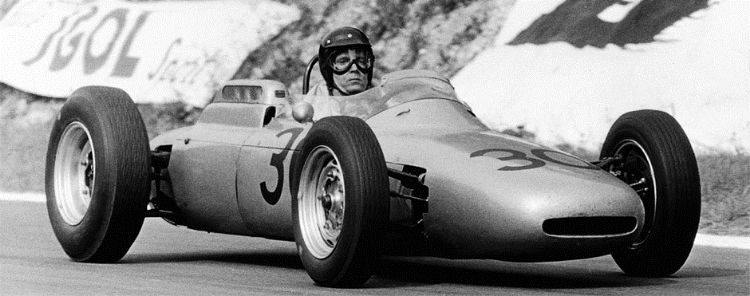
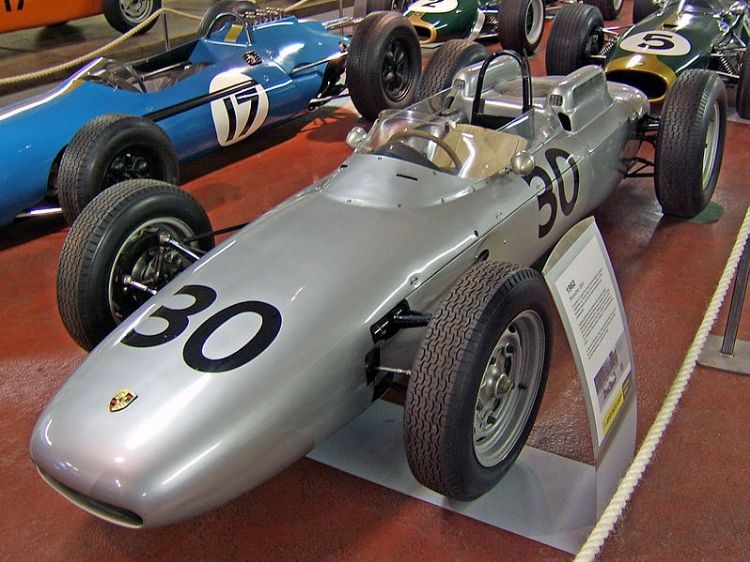
I chose the Porsche 804 as it currently is very poorly served in the slotcar market. Cartrix has recently released one, and as a limited issue of 200 pieces, is not generally available. No doubt there will be more to come from them, but who knows when. What I have decided to do is give one of the FJ’s a new lease of life in the form of a new motor (an FF low speed motor from Dart Hobbies (BWA) Canada), some proper steering, and a paint job befitting the subject matter.
Dart Hobbies
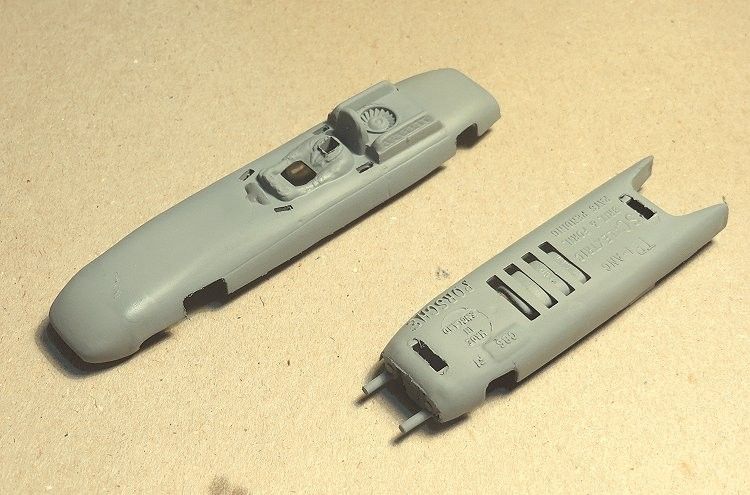
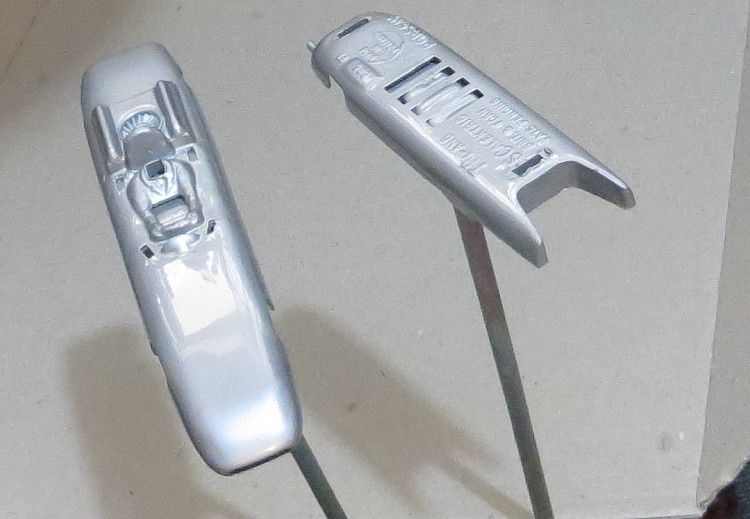
The Scaley body is a type of polymer product like polythene or polypropylene, and because of this there are a couple of inherent problems with it. Number one is that it won’t take to painting kindly because of its shiny resilient non stick finish, and the other is the dimples and valleys and distortion in the body due to the shrinkage not only of the moulding, but of the aging process of the moulding. As these objects age, heat and ultraviolet play nasty tricks on the material, and with the body approaching forty five years old, there will be a multitude of defects that will need attention.
First up though is to strip the model. Removing the steering unit and the motor is simple as they are clipped in. The drivers head and screen will also need removing, this will require the little tabs which are inserted through the body to be carefully trimmed on the insides with a sharp modellers knife to allow them to be pushed out through their holes.
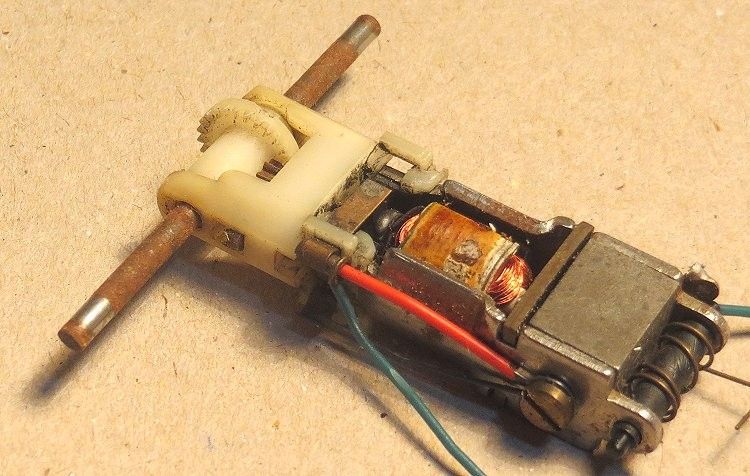
The motor and steering will need attention. The open frame FJ motor was discarded. On this model it was burnt out so I had no problem robbing it for spares. The pinion was very carefully removed by grasping it by the tooth valleys with a small pair of modeller’s sidecutters and carefully twisting it off. The nylon bracket on the end of the motor was then removed. To fit it to the end of the FF motor requires a couple of jobs to be done. Firstly, the parts that held the brushes were cut off flush with the end of the bracket; this end was then sanded flush as it needed to fit snugly against the end of the new motor. The next job was to open up the armature / pinion shaft hole to fit the boss on the end of the new motor. This I did by opening the hole out progressively with a succession of drills, increasing in diameter until the desired aperture was reached. The reason for doing it this way was to ensure I didn’t move the hole off centre by boring too much out to start with; the smaller progression will allow the drill bits to self centre while they are cutting.
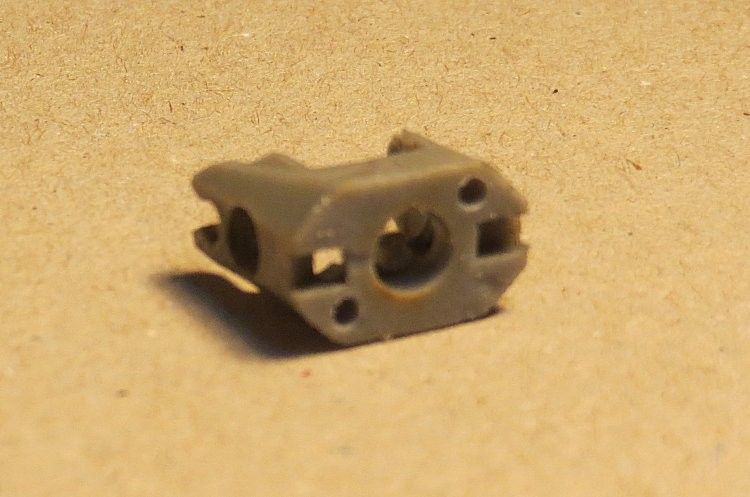
Once done , the new motor shaft needed trimming. The length was calculated and a couple of trial fittings made sure I didn’t take too much off. Lastly, to help the glue hold the nylon bracket to the motor, I drilled a couple pf holes on the joining face. Combined with the screw holes in the end of the motor, this well help key the bracket and motor together. On an earlier attempt I actually glued the bracket on crooked and believe me when I say it took some removing!
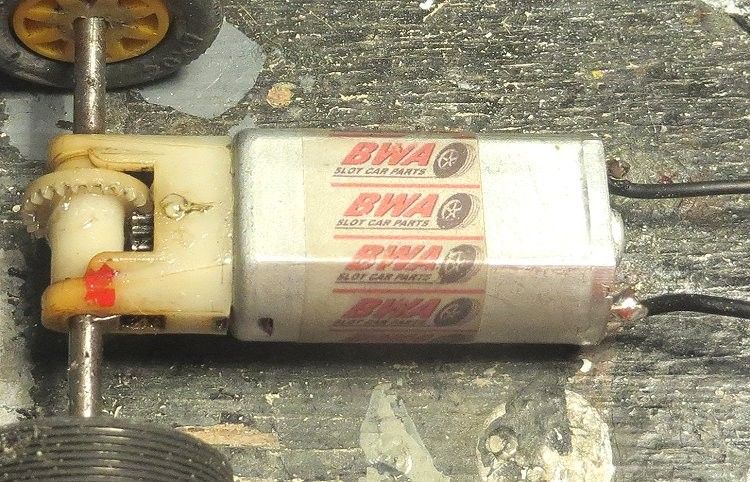
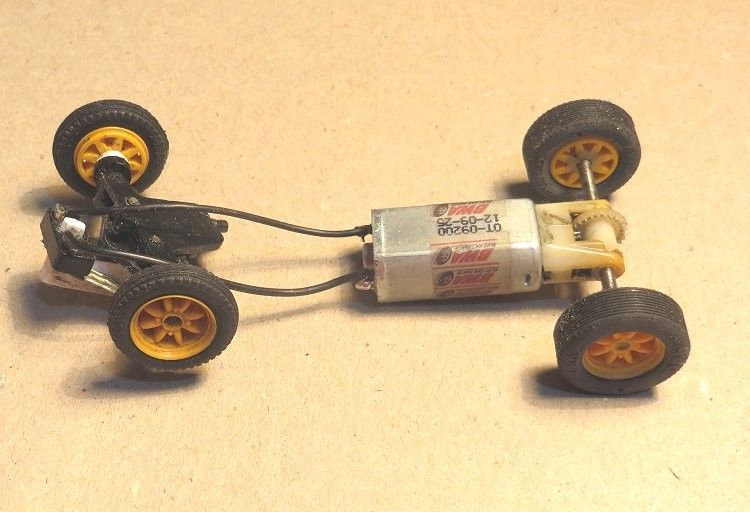
So there we are, the transaxle bracket can be glued squarely to the back of the motor once the pinion has been superglued to the armature shaft. We now should have a one piece motor / transaxle unit!! This unit needs to be offered into the body halves. You will note the terminal end of the motor will fit snugly against the motor mounts beneath the driver. On this model I trimmed the motor mounts slightly to allow the assembly to slide forward another millimetre to allow the axle and gear to miss the rear end of the body. The lower body half was clipped on to make sure both halves close completely.
Once the fitting was finished I placed a long thin billet of blue-tac inside the upper body half and pressed the motor assembly into it. There is plenty of grip in this method, but to be safe I applied some superglue to the front end of the motor where it sits between the motor mounts. The only other revamp was the steering. The model comes with a woeful steering unit which is floppy and very loose. The simplest solution for me was to use an earlier FJ steering unit from the spares box. They are a lot less loose and give the model more positive steering.
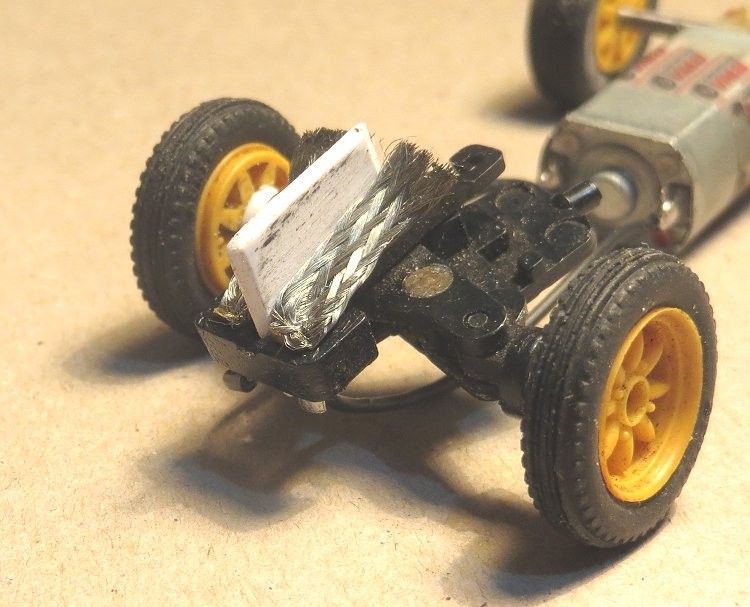
For those familiar with the Scaley Formula Juniors, you will remember the pathetic guide and pickup braid system. I decided this was not going to spoil a good effort, so I created a slot in the end of the guide arm and created a guide from 1.5 m.m. plastic card. Again this was experimental but finally got a guide which sits 7.0 m.m. into the slot (you will need to adjust your guide to suite your track). Lastly, the braids were replaced with some soft braid material. There is not a lot of weight to the front of this model and not a lot to attach it to; if the braid is too hard and inflexible, it will cause the model to stutter in corners.
On this model the steering unit can rock from side to side; on an earlier conversion I glued the steering assembly in place, retaining the steering but fixing the rocking motion. Either of these seems to work well but I would make the observation that, as with a lot of Scaley models, if you are racing on a banked circuit, then it may be best to leave the steering free to rock.
On the body, the two halves are distorted and to overcome this I glued a couple of short ‘tongues’ of plastic to the insides of the lower body. This had the effect of lining up the edges of the body halves when they were assembled. On the Porsche the nose is a separate item too. This I glued firmly in place and sanded a lot of material off to get a better slope on the front. The join was filled as part of the body preparation process.
The body surface needs to have some sort of keying properties. The simplest way is to rub the body with 1200 wet and dry paper. This will scuff the surface and help the paint to stick. But you will need to avoid the edges of the moulding as this process will cause the polymer to feather, and this will then stick out through the paintwork.
Once rubbed down I then primed the body with Tamiya acrylic flat neutral grey. This keys quite well and if you thin it, it will go on quite smoothly from a hobby spraygun. Once applied and dried the body needs another light rub over with 1200 wet and dry. This will reveal all the body contour defects and Tamiya body putty will need to be applied to these carefully and sanded back when dry. Once again, dust over the repaired spots until the body is smooth. This may need to be done several times.
When all the blemishes are fixed and the last coat of primer was applied, I rubbed the dry coat with some coarse linen (or cotton), this had the effect of smoothing the undercoat without wearing too much away. The silver I used is a product called ‘bright chrome’ available from the local auto store, I decanted some into my spraygun bottle and sprayed on an even coat. That was left to dry for a day and then the first coat of clear was applied. Having had troubles before with specs in the clear coat after using my spray gun I decided to apply the clear straight from the can.
This is Tamiya clear enamel. I shook the can for a couple of minutes then stood it in a takeaway container full of freshly boiled hot water for five minutes. I then shook it vigorously for thirty seconds and test sprayed a piece of card. The body halves where then given an orange peel free coat. Once dried, the decals where applied. The side numbers where cut in half because of the body halves. After a day drying the body halves then got a second light coat of clear enamel. Finally and again, another day later I gave the body its final coat of clear. Once dry after a day or two, I painted basic driver detail and painted the helmet. Also at this stage I gave the windscreen a coat of clear just to freshen it up.

Last challenge is getting the power to the track. On the front I opted for some early Airfix GP tyres also from the scrap box but also still readily available on eBay if you know where to look. The rear tyres were easier to find, these are Ninco Classic ribbed tyres or their MJK equivalents. I have already completed one of these models and know that they run well, thereby taking the frustration out of what was a very frustrating model. Other Formula Junior bodies include the Lotus 25 and Cooper T60 plus the Graham Hill BRM and an early rear engined Lotus and an Austin Cooper ?
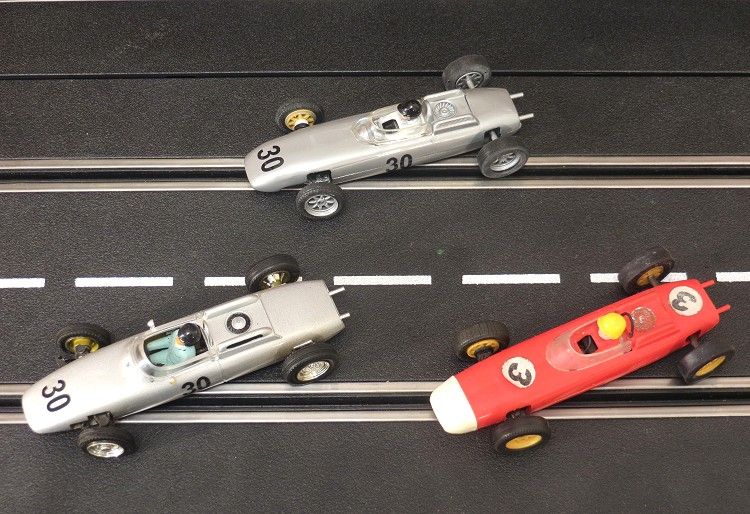
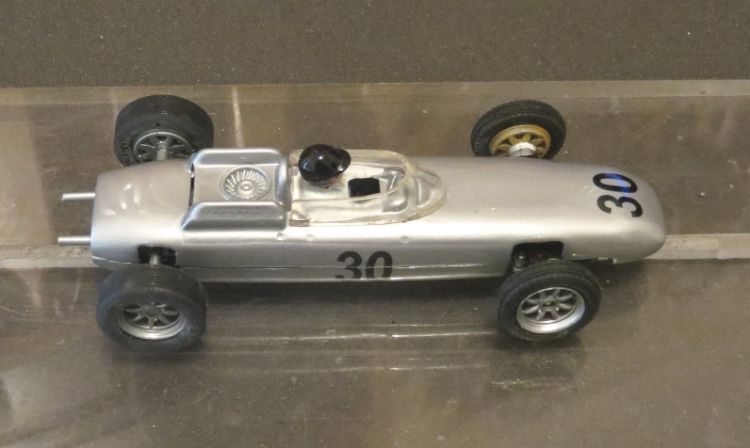
[pre]Centre top Scalextric 'after'
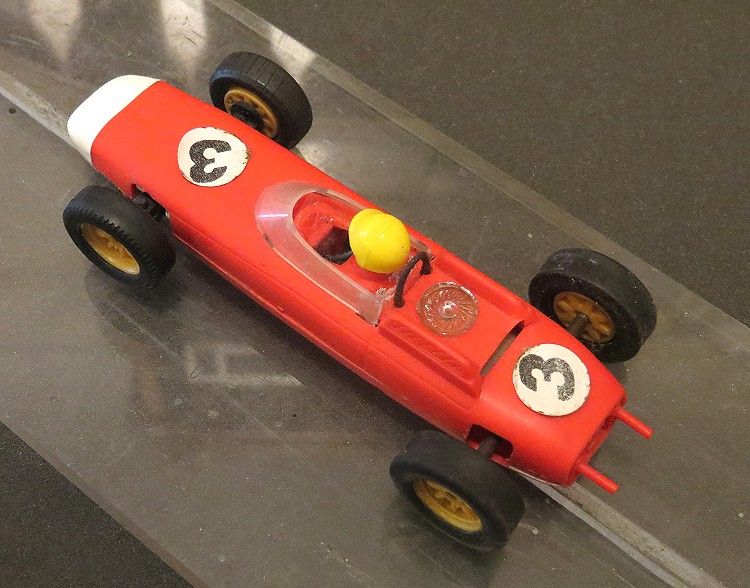
Left - Airfix Right - Scalextric 'before'[/pre]
On the track!
For scale authenticity you would need to go a little further than I have done. The first change would be some scale wheels, the Scaley Minilites are not by any means, and the would have had pressed steel wheels very similar to the early Porsche and Volkswagen wheels. The exhausts were also different lengths and a quick snip with a modeller's knife would fix that. You might also consider some rear view mirrors!
So as usual, if you are looking for a challenge and a very rewarding one, give this a go and let me know how you got on!
