.
Aston Martin Vantage
Le Mans 2012
by Phil Wicks
Aston Martin by now should need no introduction, being one of the worlds most enduring sports car builders, although the concept of sports cars has changed over the years, there is still an element of ‘hand crafting’ about these cars. They are readily recognizable at a distance by their familiar grille pattern if nothing else.
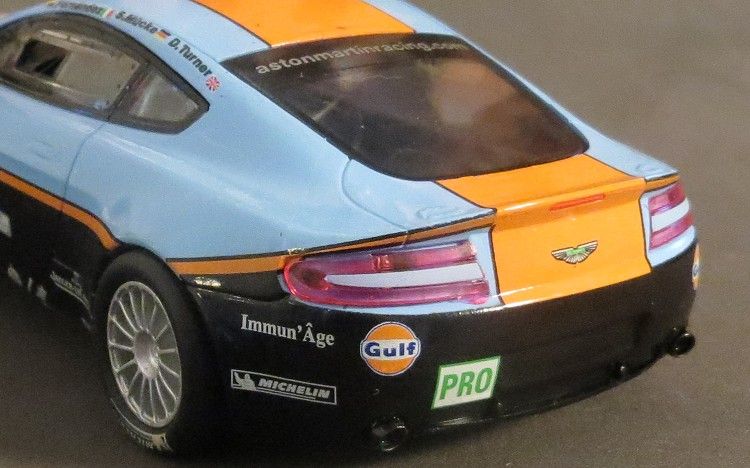
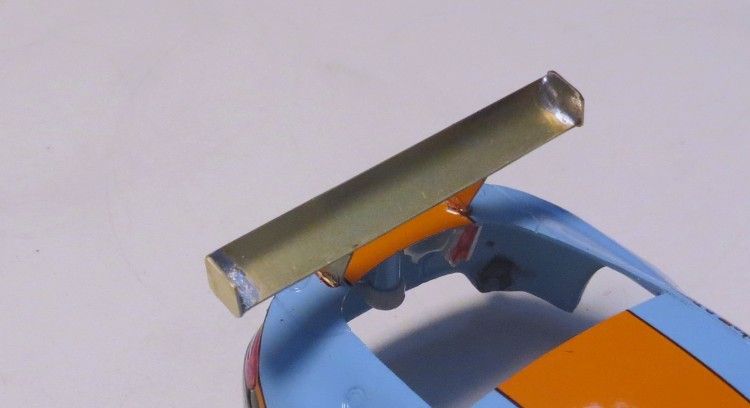
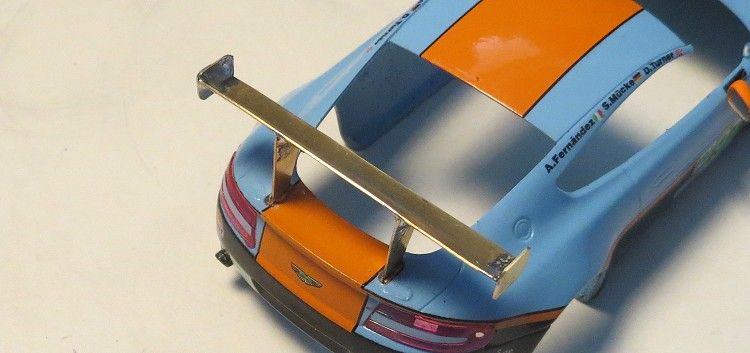
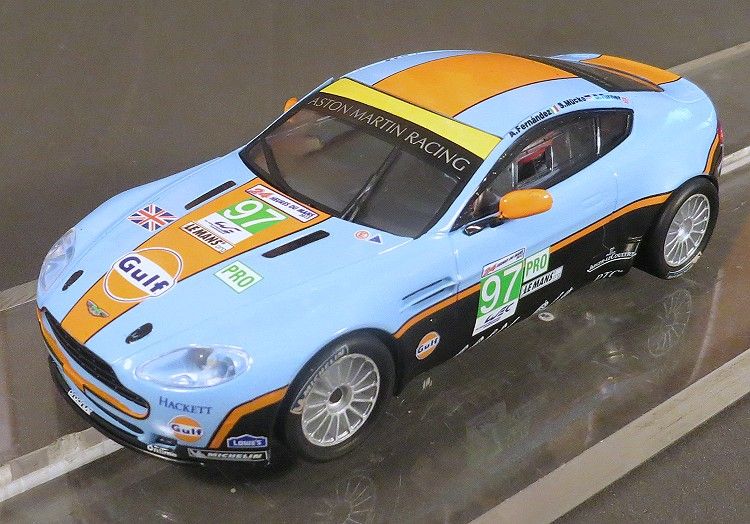
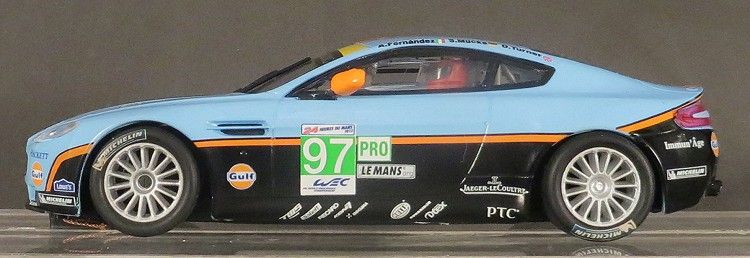
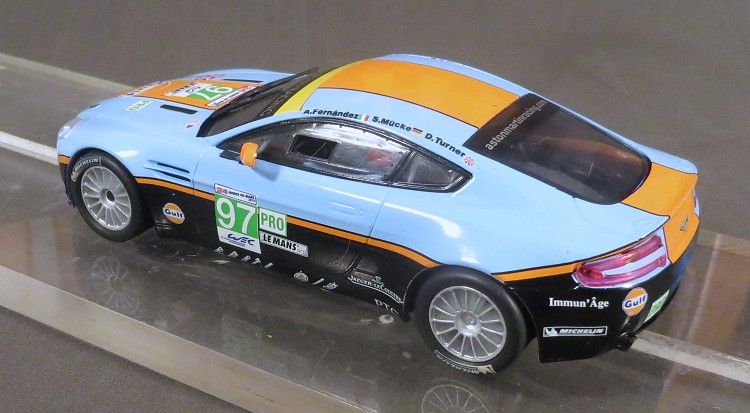
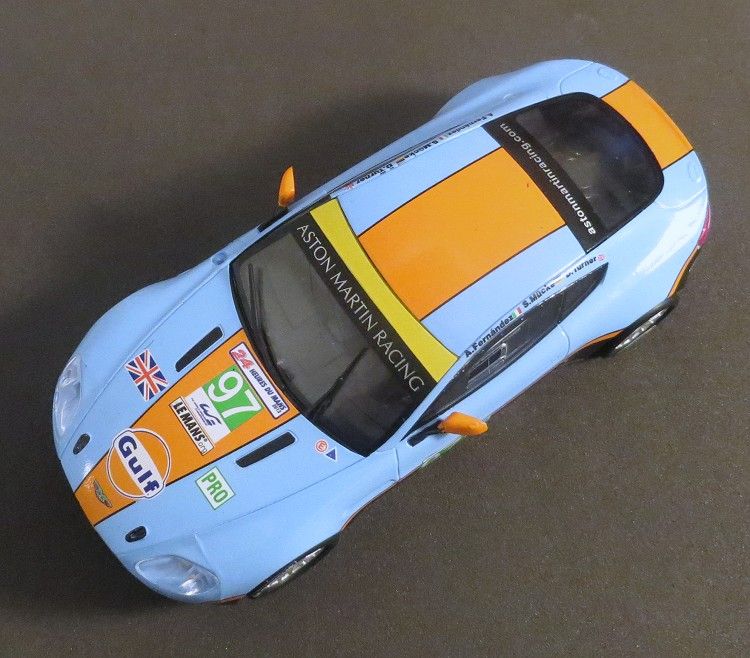
The model in question is for the most part a reproduction of AMR’s Vantage GT2 as raced at Le Mans in 2012. I say for the most part as the tail wing is missing and there is no evidence of it ever going to be there? On the real thing the pylons which support the wing are very tenuous and look extremely fragile. Perhaps SCX have decided to omit this delicate piece of modeling! But, I digress; it doesn’t detract from what is left!

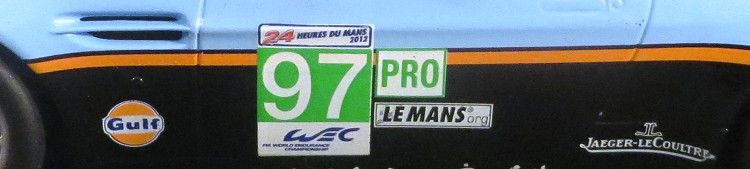
So, Aston Martin had had several years of LMP racing and decided it was no longer for them and to try their hand with something from off the production line. They had also competed with the DBR9 in endurance racing, also with mixed results; and with some rule changes in 2011 they entered the Vantage in the 80th Le Mans GT2 class. This was to be later changed to LMGTE Pro. Not a bad decision as the 97 car, driven by Stefan Mücke, Adrian Fernández
and Darren Turner finished 332 laps later in 19th overall and third in class in spite of leaving the track .
The car was predominantly the same as one from the showroom with the interior removed, with the exception of essential upgrades to chassis and driveline. The engine was AM’s 4.5 litre V8. So after AMR’s efforts to produce a credible track contender, what have SCX done to emulate this, mmmmmm?
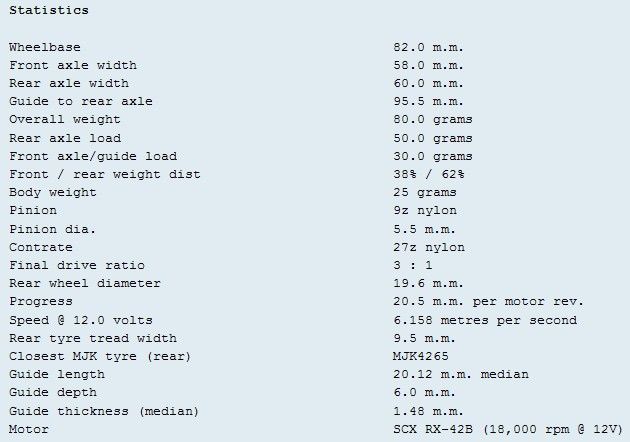
I have to admit I was taken by this model at a recent race meeting and having looked over it decided it had a lot of attributes which would contribute to the model being a race winner. I have an SCX DBR 9 but struggled to get it into tip top track condition, eventually retiring it in favour of an SCX Porsche GT1. I think it was just too long and something more square was needed for the GT class. It will have big boots to fill as the GT1 I currently contest is almost unassailable with its RX – 42B motor, ten tooth pinion and MJK rear tyres.

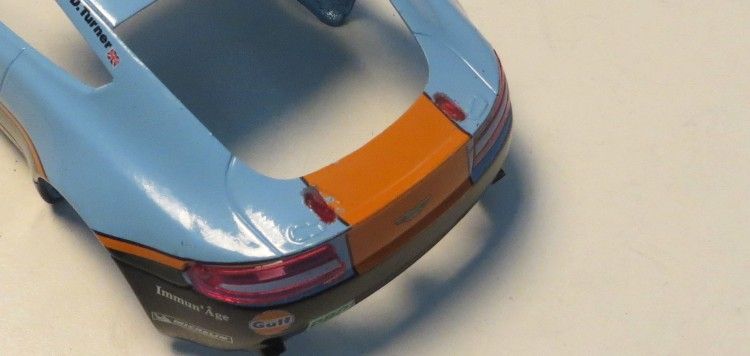
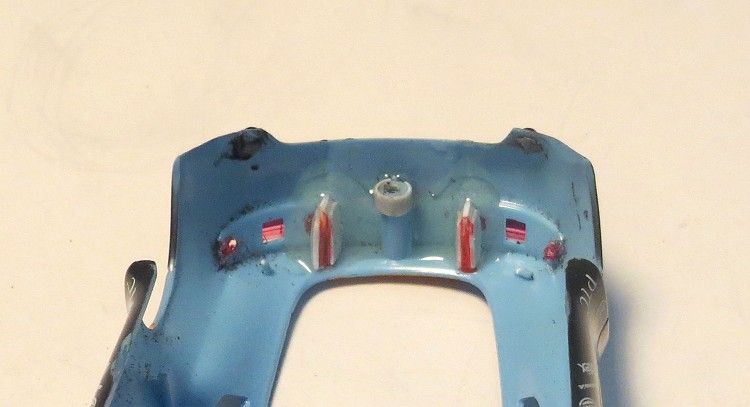
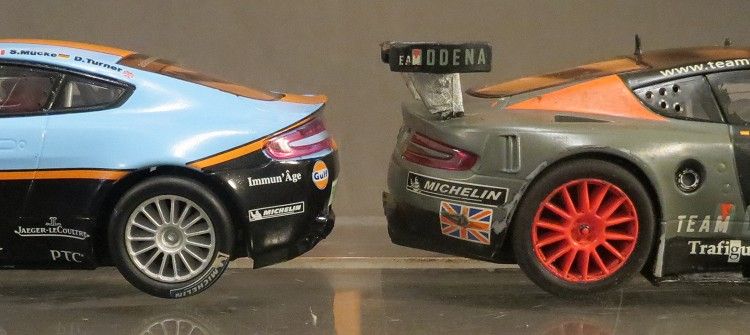
Starting with a good look around the body it is obvious that the Gulf livery distracts you from the several external defects the model has. What are they? Well; first impressions tell me the paint job is a bit orange-peely and doesn’t have that hard shine that even the real track cars do. Also the finer tampo in places is a bit ragged around the edges. Other detail like the fuel filler cap, recesses on the boot lid, antenna detail and front side grilles have also been ignored.
The front grille insert is loose in its recess and will need a spot of glue, one of the wiper blades swings about at random and apart from the rear lights being an unusual shade of pink, the paint has run onto the body. But most annoying is the fact that the right hand ‘A’ post is broken and detached from the windscreen at the top! Hopefully, some careful gluing will rectify this. One plus is that the door mirrors are flexible and should enjoy a long and healthy life. Not to worry too much though as this was not bought to be a shelf queen, and allowing for its price ($52.00 locally), I can live with a few defects, providing the mechanics come up to scratch!

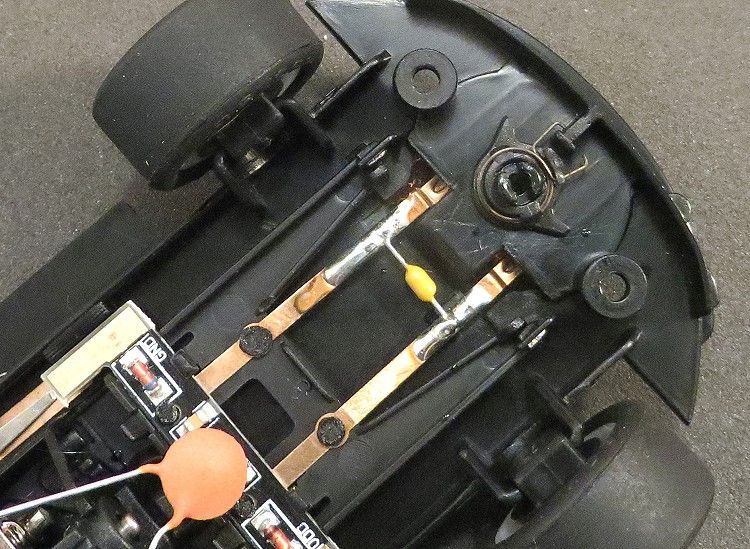
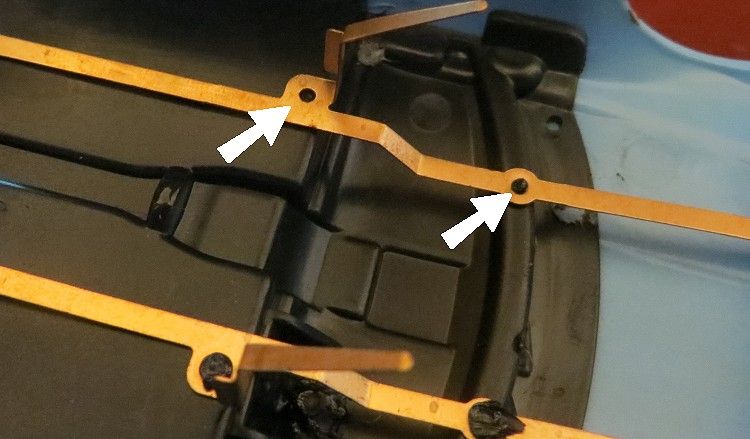
Next up was to remove the body and give the insides the once over; three screws hold the body fairly firmly and once off the inside looks neat and tidy. Under the body the trademark copper conductor rails are neat and tidy….or are they? It transpires one of the rails has not been spot fixed to the body! Anther job for Superglue? The driver’s tray is secure and the only extra work I would do to the body is to sleeve the body mounting posts as they are quite slim and look very vulnerable. I may just run this model with a loose motor pod negating the need to either disconnect the lights or bend the contacts up.
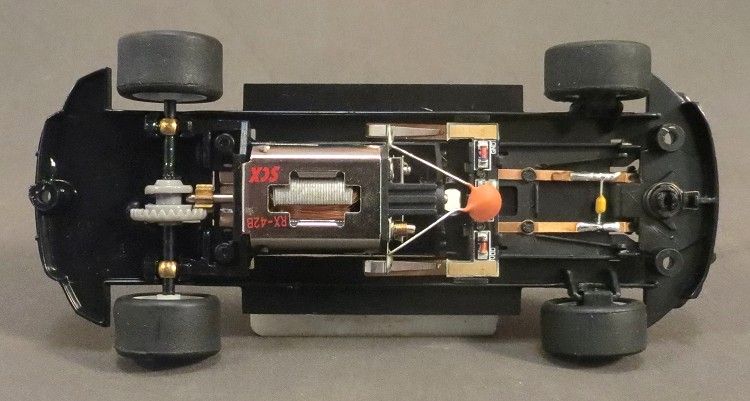
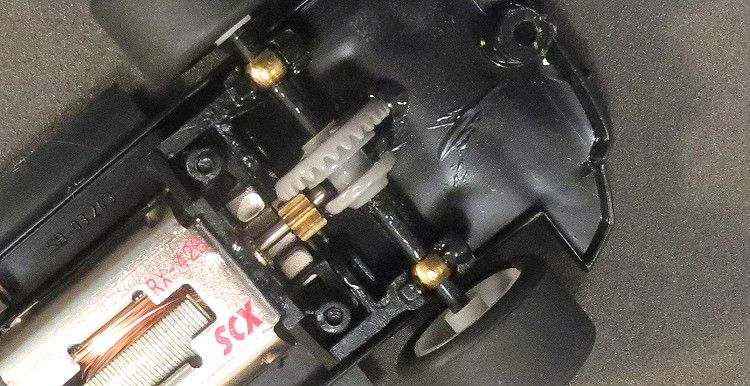
The chassis contains a few ideas which SCX has come up with in the last few years. Firstly, there are independent front wheels, these in themselves are a good idea if made well but they are a little bit wobbly, but providing they don’t get any worse they should be ok. I will be applying a drop of Vaseline on the spindles to minimize any wear that may occur.
In the past I have had models shed wheels (F1’s) after some use, as the spindles quickly wear down if left dry. Closer inspection of the guide shows it is a little sloppy but I have managed to remove this play in previous models by coating the slack parts with a layer of superglue and reassembling after drying.
Another idea I like is the motor pod which is supported by four pins and not two as has been commonly used more recently; although this idea is not a new one. First issue with the chassis is here. The pod itself is longer than the aperture it sits in. Not buy much, but enough to prevent the pod from working properly. This will be fixed by scraping the front and rear edges of the aperture and pod with a hobby knife to allow free movement. The pod is never completely loose as the springy contacts on the motor restrains the front end to a degree; time will tell if this needs changing.
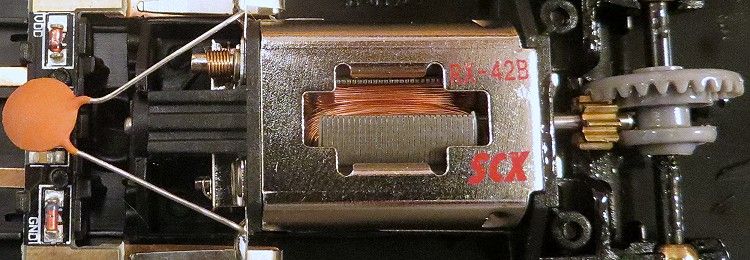
The traction magnet is typical adjustable SCX and I can’t imagine there being a situation where it cannot be adjusted to a useful level. For non magnet racing the motor and rear axle are tight in their locations and again, I’m not expecting issues with them. The motor is an RX- 42B which is rated at about 18,000 rpm but it is not hard to find another 1,000 – 1,500 rpm just by bedding in the brushes. The rear axle is a second source of concern!
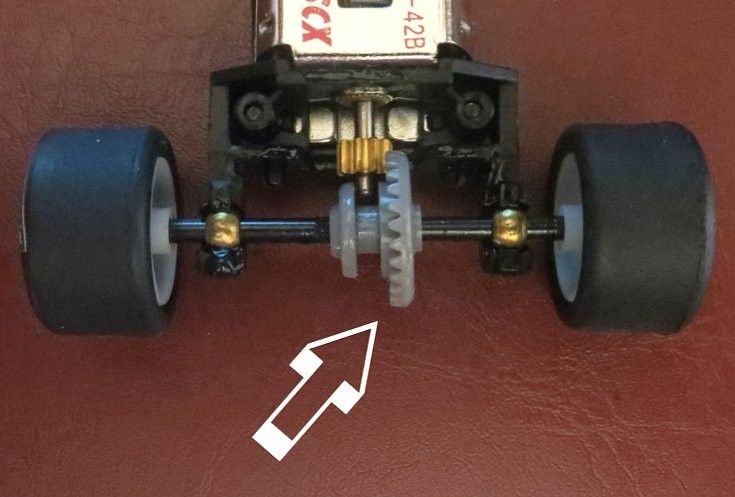
The contrate is decidedly bowed, this has been caused by forcing the contrate over a knurled centre section on the axle; this expands the central hub of the gear and causes the crown to buckle under stress. Also, there was no effort involved in removing either rear wheel, one of which slipped off quite readily, and mysteriously there are no signs of damage or splitting on the hubs which often accompanies this behaviour.
The wheels too are a bit delicate and I expect I will spend some time reinforcing them too! The only consolation with this end of the model is that SCX have some of the best axle bearings, why’s that’ you say? They are a little sloppy which can be fixed but they are self centering, meaning they don’t bind against the axle when assembled as they are allowed to float into the best position.

Lastly, SCX can make a good set of lights but it is not uncommon for the lights to stop working individually or completely! It is my experience that SCX lights are a bit susceptible to higher voltages and failure seems to come about if the models are run on too high a voltage! I also like the idea that they still use the little 3.0 m.m. LED’s for the front, If your local group have night stage races then these lights will be more than ample as the beam from the lights appears to be directional, Most other makers use micro LED’s which floodlight the immediate area only.

When I first got the model I suspected it was shorter than the DBR9 and this was confirmed fairly early on in the piece. It is also slightly narrower which isn’t a big deal. Also the wheels are considerably smaller. I don’t know if this is a modeling concession on behalf of SCX or if indeed the two models do have different sized wheels
So, for the price not too bad a model. I was disappointed with the ‘A’ post and wasn’t surprised about the contrate. Nearly all the faults are simple fixes and it shouldn’t be too long before the model is working hard for its keep!
Aston Martin Vantages on Ebay
Aston Martin - Le Mans
So now we have come to the ‘to do’ list and it goes something like this
Replace the contrate, probably with a Slot.it or similar.
Replace the pinion with a 10z brass gear.
Reinforce the insides of the rear wheels and sleeve the axle hole.
Sleeve the body mounting posts
Glue the ‘A’ post back in place.
Glue the grille in
Scrape the ends of the motor pod and the aperture
Lube the front hub stub axles
Take the slack out of the guide