.
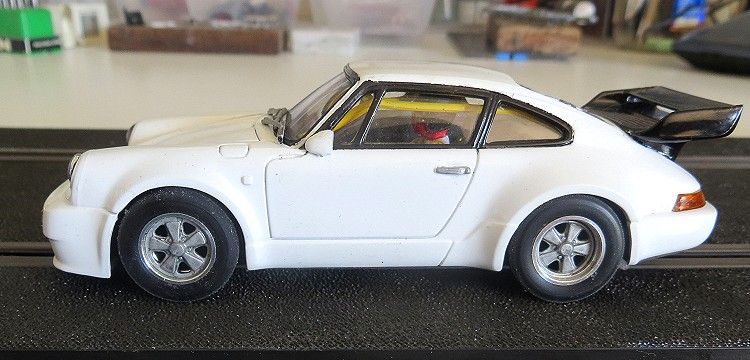
ARII Porsche 911 Turbo
by Phil Wicks
The Porsche 911 is truly one of the most enduring car images of all time. Easily recognisable from a hundred metres away its familiar shape has spent almost a lifetime gracing the race tracks on five continents. Not always an instant success, as the early models with their spindly road tyres had to contend with serious oversteer, especially on slippery surfaces.
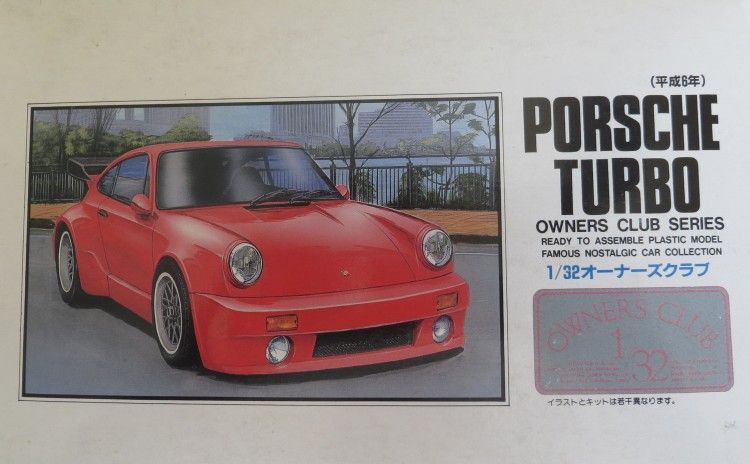
One reason I decided to motorise this model was its continual presence on eBay searches for something new to kit bash. When you are looking at Triumph Heralds and rubbing your chin you know there is something seriously amiss with suitable models on the net. So, after convincing myself this would make a nice model slotcar for home fun, I put a sensible eSnipe on it and to my surprise and pleasure, I was the lucky bidder! The intention was to jazz it up a bit but on opening the box I saw fabulous little model which, with the right colour scheme, would make a great home racer.
Porsche Turbos on eBay
Let me say now this is a very well made model. ARII have captured the feel of the car and have included some nice fine detail. The good thing too is that the body is very light! Mmmmmmm .....? You guessed it, another candidate for an HO motor! Not only that, if I want to, I can make a second chassis with a low powered S can which I could take to the track; but one thing at a time!
This model needed to go together in various sections at various times. While the interior needed some drying and curing time, the chassis could be built at the same time between coats of paint, and finally, when both bits came together for final assembly, there was enough to keep me occupied for more than a couple of hours.
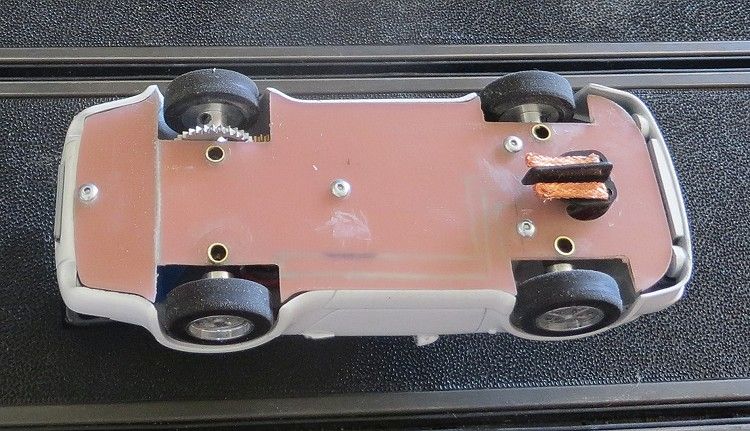
The chassis needed matching to the body and with no recesses or holes to cut it was a simple job of fixing axle mounts and lining up the motor and clamping it in place. I also decided to run the conductor strips into the copper side of the PCB as I have done on numerous occasions. It looks a bit rough from the inside as I hacked into it with a dremel type cutting disc to save time. Earlier models have been carefully and painstakingly scored out using the back edge of a modeller’s knife. Once installed and coated with a coat of flat black or flat grey on the outside, no one will see it!

One concession is the ‘Wixle’ front end, yet again, to reduce front end drag in shorter corners. Until now I have been making the collars using aero modeller collars which needed quite a bit of work. The axle holes have to be opened out to 3/22†and the sides of the collars have to be turned down to make the collar thin enough (2.5 m.m.). But now! I can use off the shelf collars from Pendle Slot saving a considerable amount of time and cutting discs!
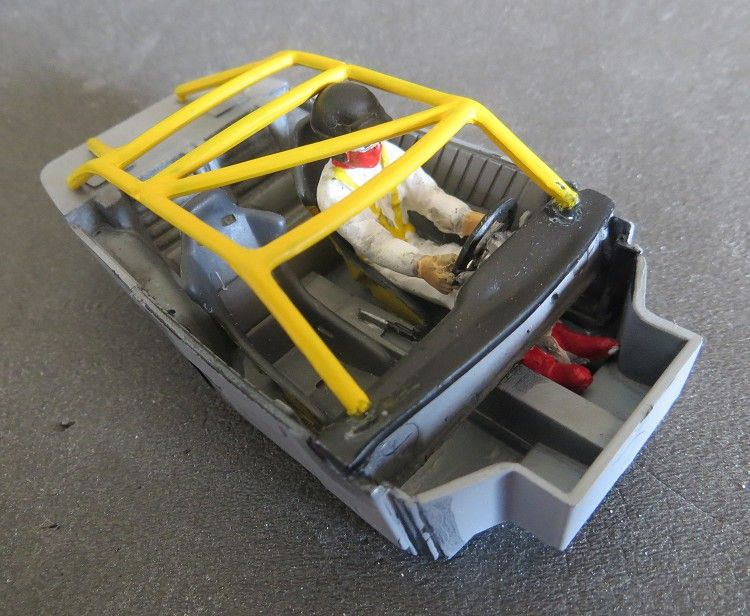
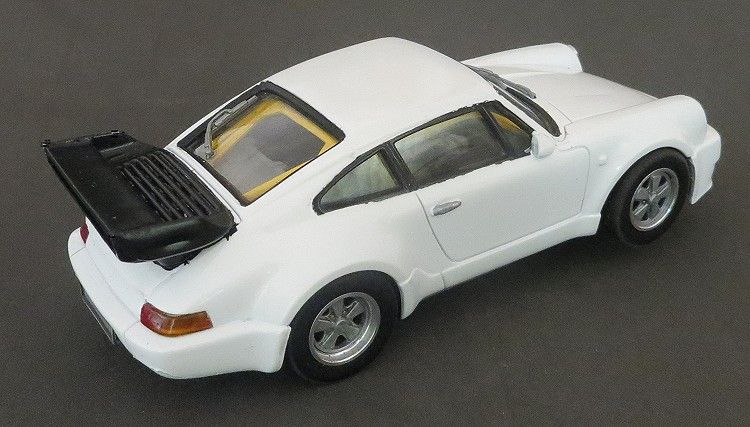
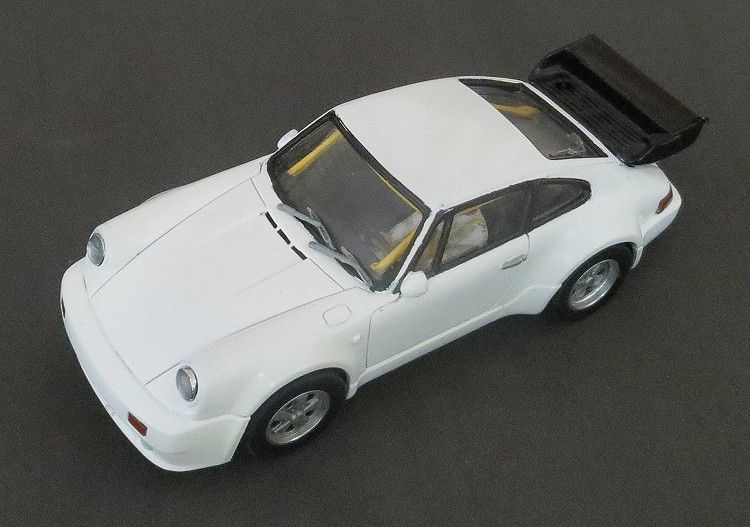
The interior comes with full seating, a reasonable dash, centre console detail and a roll cage! Unfortunately it does not come with a driver, but by chance I have half a dozen drivers resin moulded from Fly s by the look of them. The seats were very narrow so some time had to be spent reshaping the nether regions of the driver before he slotted comfortably and effortlessly into the driver’s seat. With all the adjustments made the components were painted and one by one glued in place, starting with the driver. As with previous models I chose to glue the steering wheel and column onto the driver before fitting him, this saves a lot of frustration down the line!
While all this was going on the body was going through the decoration process, A lot of items had been painted on their sprues, saving time and minimises the risk of losing some of the smaller items, (lights etc). The wheels and tyres were also from PSR, and were the MRRC Porsche “Fuchs†style wheels. The wheel inserts and wheel centres were painted. Once dry the inserts were placed in the wheels, I then coated the outer face of the wheels and inserts in clear enamel. This gave the wheels a clear protective coating while fixing the inserts in place at the same time! Clever!
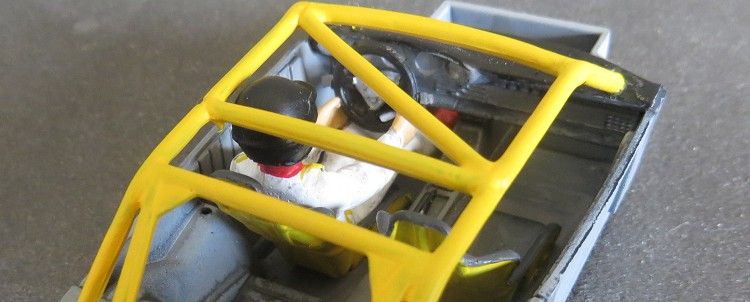
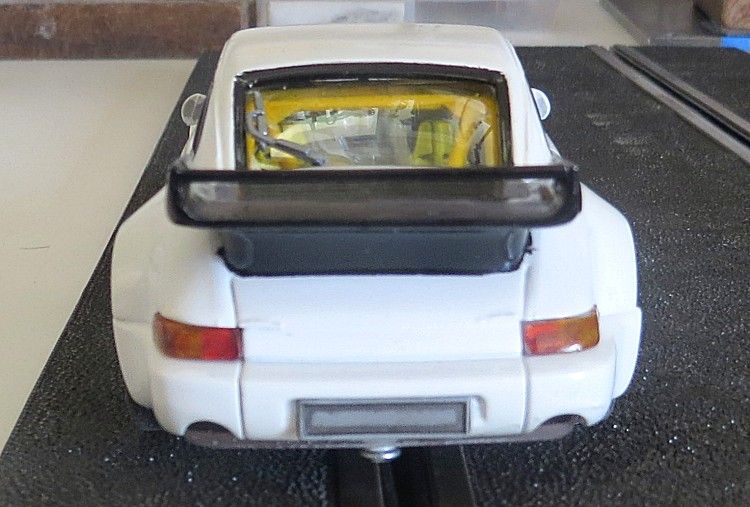
The interior was finished in medium flat grey and when dry, the seat and trim seams were lightly floated with a very dilute flat black, The driver just fits nicely under the roll cage which is good, as the roll cage fits snugly against the one piece window moulding, and there was no space left after fitting this part.
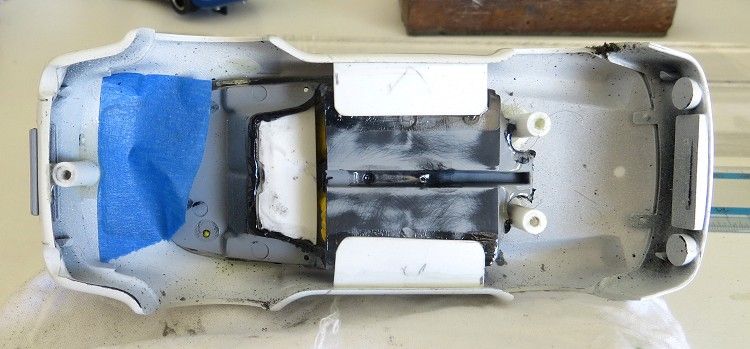
On the underside you can see the three chassis mounting posts these had to be juggled in around the interior tray detail. Also the rear of the drivers tray which sits over the motor had to be raised three or four mil to get enough clearance for the motor, another part that just squeezes in place. To fit the drivers tray in I inserted the clear moulding and fixed it with some canopy glue. A day later I then settled the driver’s tray against the clear part. Then, as you can see, there are a couple of white oblong pieces, one either side in the centre. These are glued to the bottom of the drivers tray and slipped out to touch the inside of the body. A bead of polystyrene cement was then brushed down either side where they joined. These were left for twenty four hours to harden before handling further. The front and rear edges of the driver’s tray were then glued to the underbody with extra strength epoxy. The blue tape was used to mask the louvers which are part of the exterior body detail. I didn’t want glue running out of the vents at this advanced stage!!
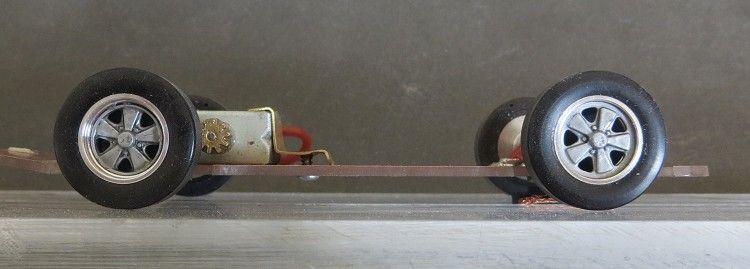
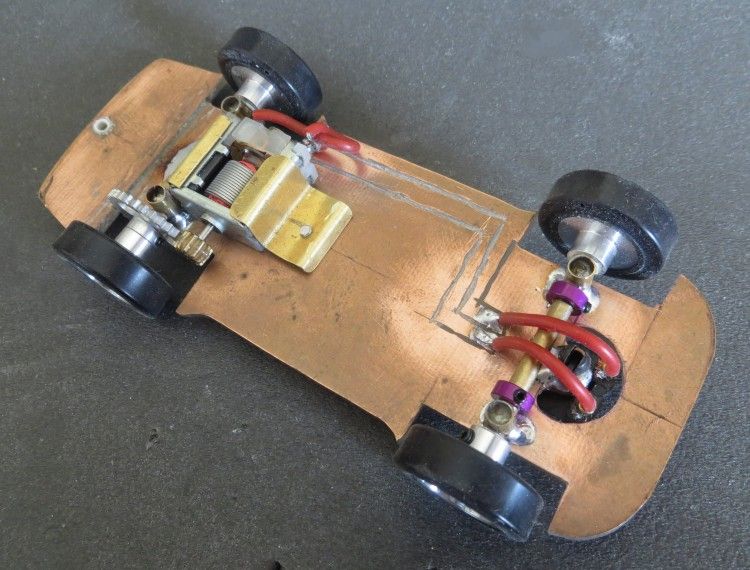
The chassis had been sitting around for some time waiting for its turn, but as already mentioned, it was of simple construction and was assembled during bodywork curing stages. I have been trying to add some ageing looks to my latest models and on this model I painted the wheel inserts with bright chrome silver. As with the interior, I then mixed a very week solution of enamel thinners and flat black so the colour was barely perceptible. With a medium pointed brush I painted it on the wheels and as hoped, it flowed around the wheel and accumulated in moulded seams and corners darkening them slightly, just as I had hoped (check out the GP BRM reno on the sidebar where I achieved it around the wheels and engine detail)
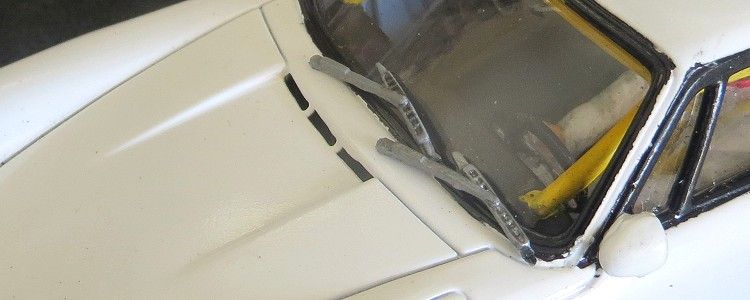
The same technique was used for wiper and upholstery detail
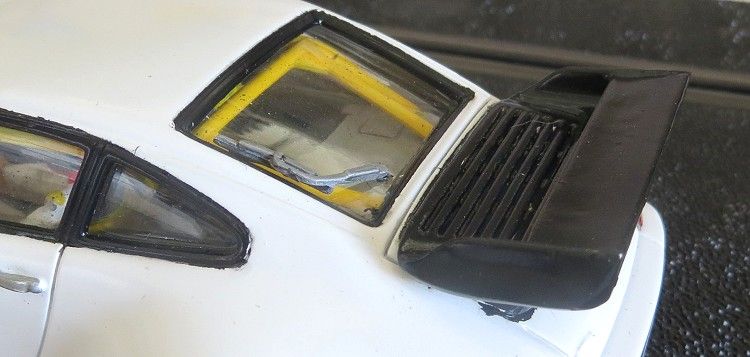
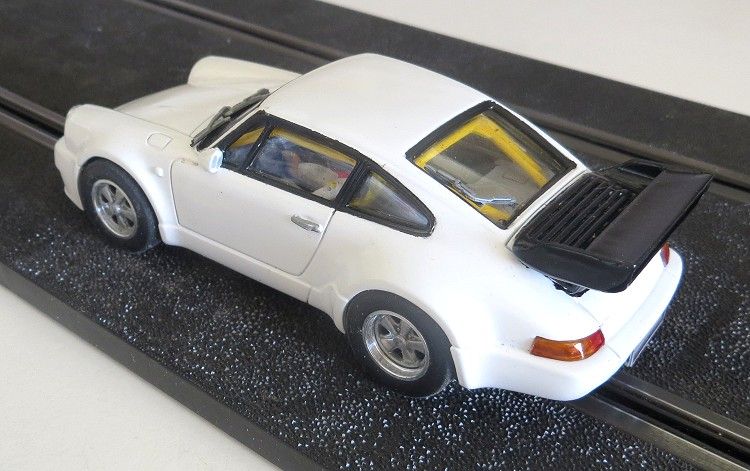
Probably the hardest part of the paint job was the window seal rubbers and trims. These are done in black but I defy anyone with or without a steady hand to paint them free hand. In the end I decided to mask them before painting them. Once masked and dried, I painted a thin layer of clear enamel along the edges of the masking tape to seal them. Also allowing a coupe of days between coats and not brushing too much clear onto the body colour or it will soften it. Again, once cured the black was painted on and left for a day before removing the tape. The idea of the clear coat is that if any paint bleeds under the edge of the tape (which it does), it will be clear and unseeable, the colour coat (in this case black) will not bleed under the tape because the clear coat has sealed it, leaving a sharp edge to the black (well, almost) practice makes perfect! The masking tape is then removed after a couple of hours drying time.
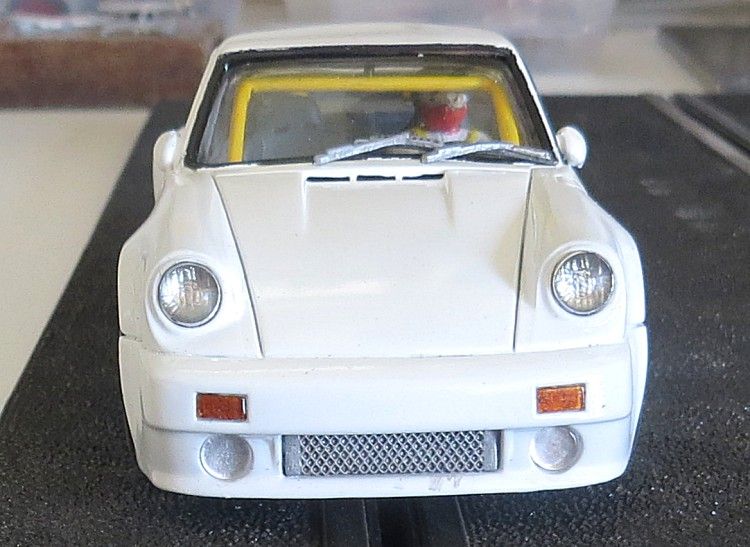
The headlights are from my friend Juan in Spain and they do come in several diameters. I only had the one size and had to file the edges slightly to get the lamps to sit in the recesses.
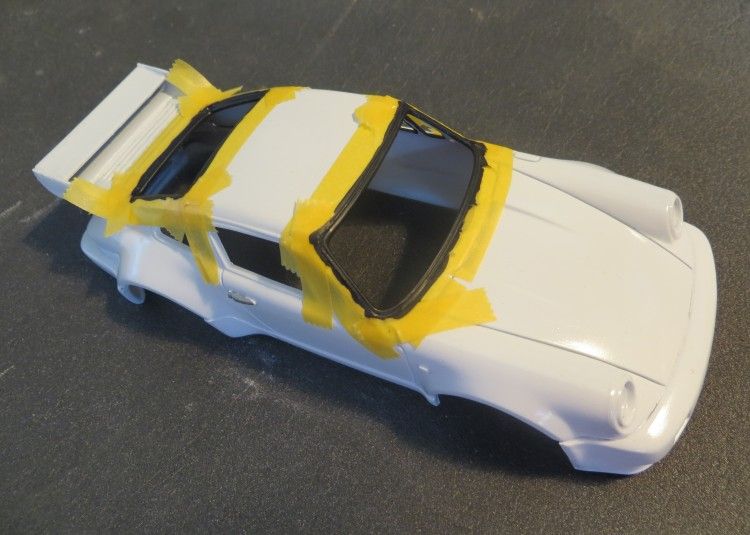
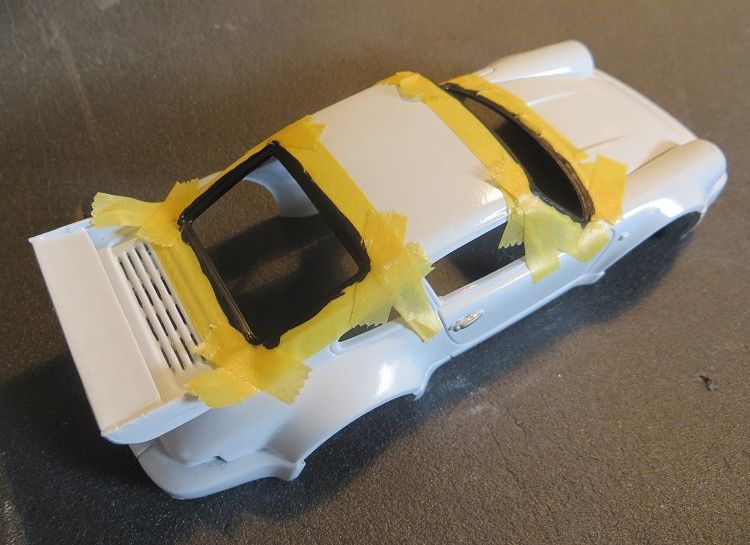
Front and rear screens masked for painting. The sides didn’t get done for at least a couple of days.
The rear spoiler was also masked and would also be brush painted. See the louvers above in the bodywork detail, these were masked from the inside to stop the driver’s tray glue running through them.
Other detail like tail lamps were painted with a bright silver base on the rear side, then some Tamiya clear red and clear orange was painted on the front sides to finish them off.
The model was taken for a test run last weekend and went moderately well. One thing I did feel was that the model, as with its predecessors, got faster with use and after several minutes circulating, it attained respectable speeds and acceleration! With the little HO cube motor it was never going to be a rocket, but we knew that. And, like the Berlinetta I have made a couple of mods to the drive train. The motor is fast enough for a bit of fun on longer straight tracks but had a bit of ‘wind-up’ on the tighter corners of more technical tracks; so, as with the Ferrari I have changed the gearing to 10:36. The model weighs in at 80 grams which I would say is maximum for these brave little motors. But they are great fun to run on local tracks even if they may never win anything!