


.
Howard Revell
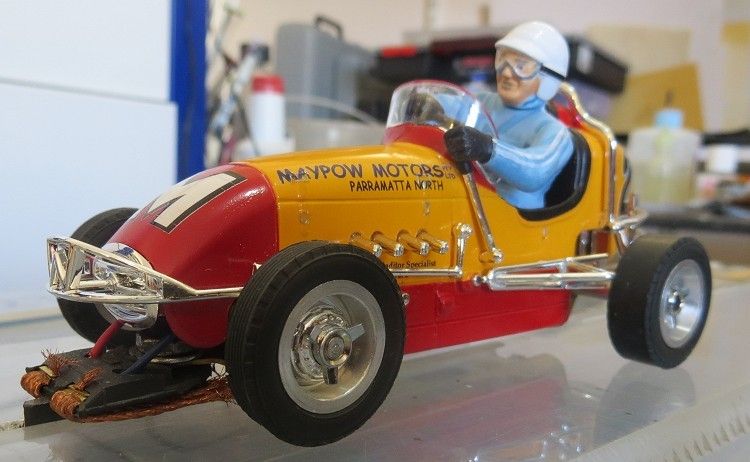
I was approached by a new member of the ‘Outhouse’ to build the model for him and as it looked fairly straight forward who was I to say no! The model was dropped off and at the time the livery was discussed and the owner tentatively asked if I could build it the same as his boyhood hero Howard Revell, a Sydney based dirt oval racer from the sixties and seventies. The only stipulation I made was that he would have to make arrangements for the decals. No worries! The following is a run down of how it all went!
EJ's Hobbies
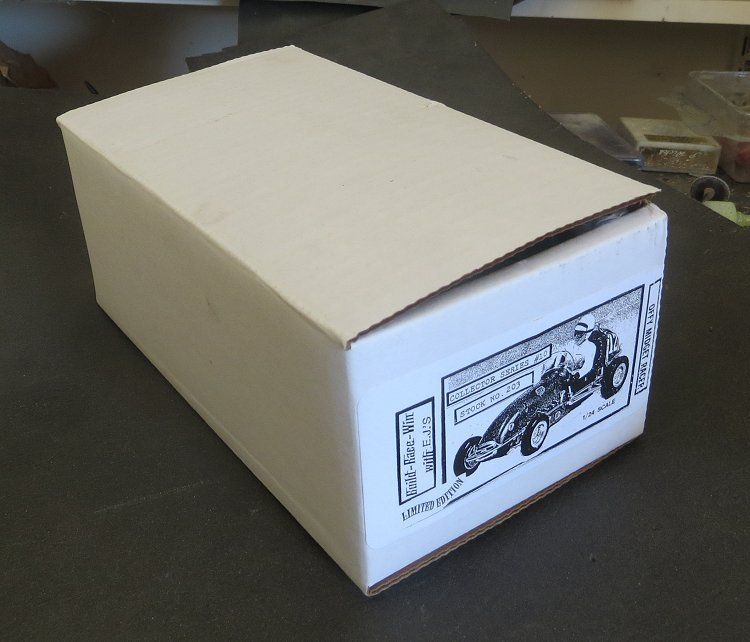
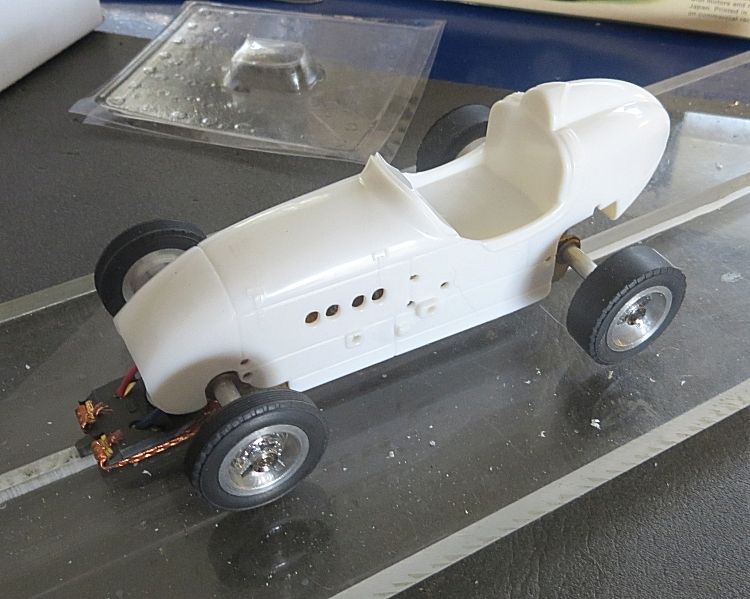
Everything about this model is retro, even the box it comes seems to be a copy of the and the way the model goes together is definitely 1960’s!! It was like handling a piece of time just opening the box and sifting through its contents.
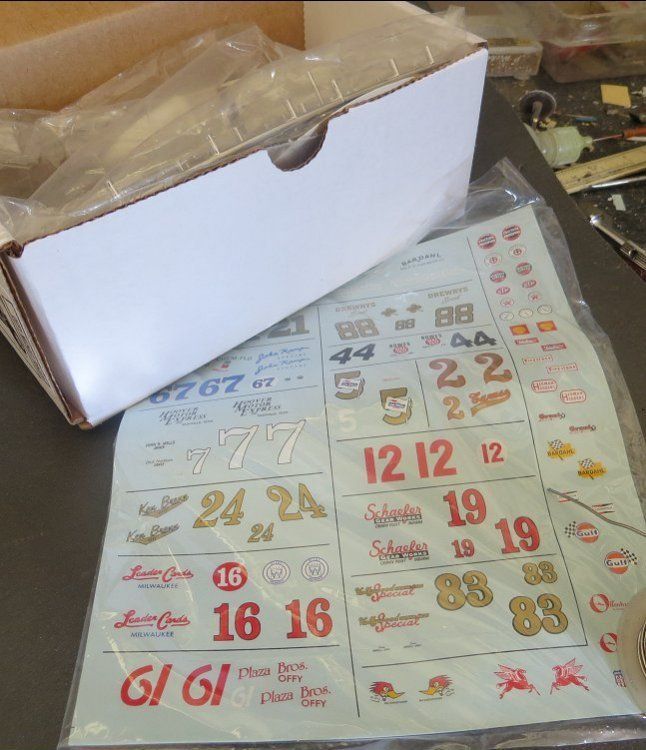
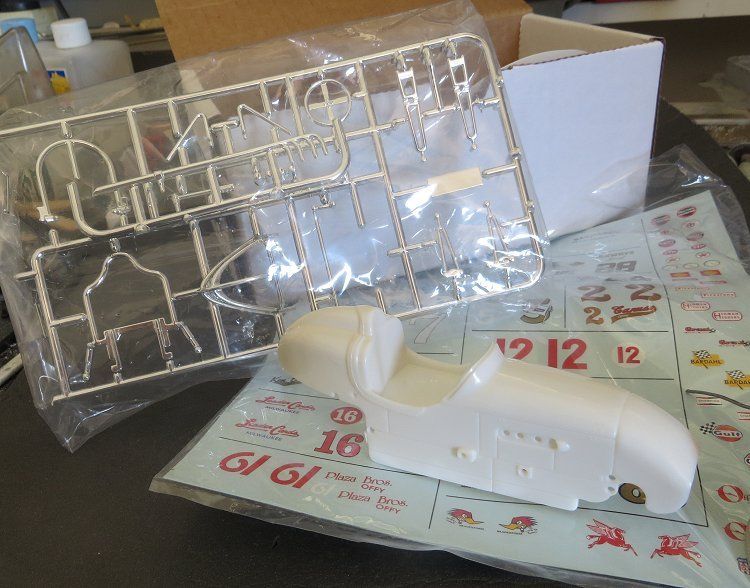
There is no shortage of detail and the kit comes with a fine set of decals which give you ten or so options for the finished model, and the anodize parts are not lacking either. As mentioned before, In our case the only option is to reproduce the model to make it resemble the Midget Racer raced by Howard Revell in Sydney in the sixties and seventies; and to do that I will need some outside help!
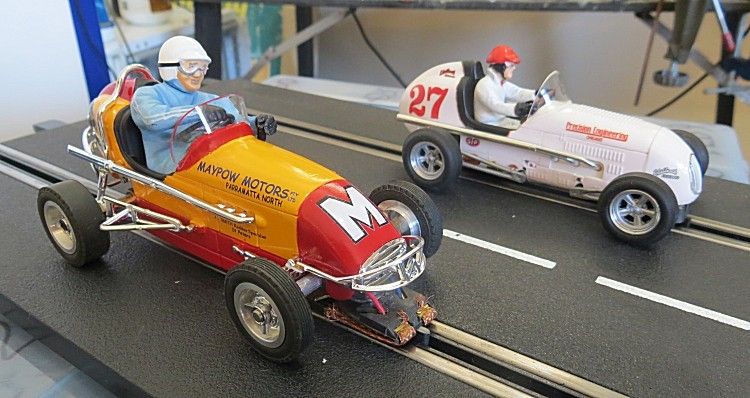
The model is reputed to be 1/24th scale, but to me does look bigger? Along side other models it seems to tower over them, the driver himself is bigger than the NINCO Kart drivers which places it about the 1/18th scale. And along side the Revell 1/25th model it again looks big. But I digress, it doesn’t detract one iota from the charisma it exudes.
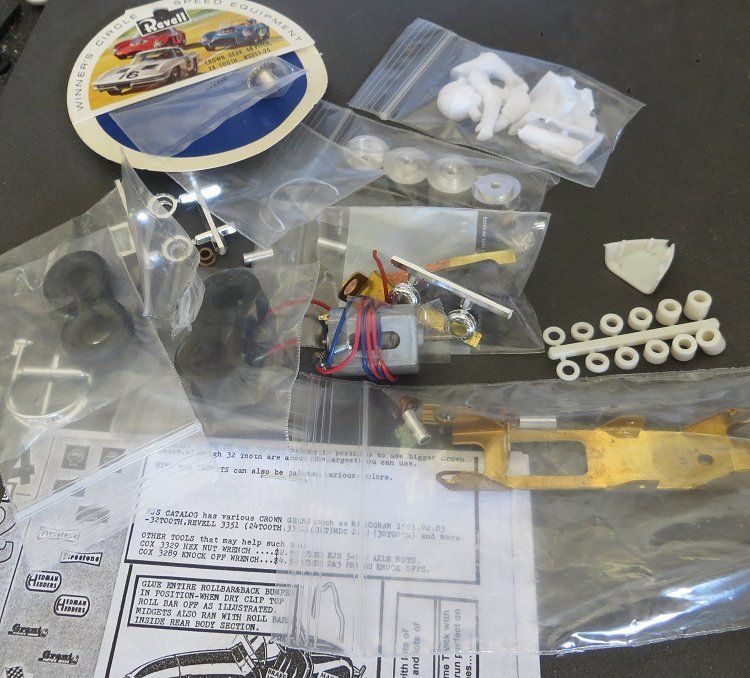
The kit also comes with some photocopied repro instructions. These do not walk you through assembly but rather give a diagrammatic approach to assembly. It is my advice that the assembler goes through these instructions bit by bit before starting, and make sure the assembly sequence works. The driver / steering wheel is the main tricky bit because this bit takes place with wet glue on the painted body parts. And trying to force anything could see the steering wheel give way. Another issue is with the roll bar and the lower rear body part.
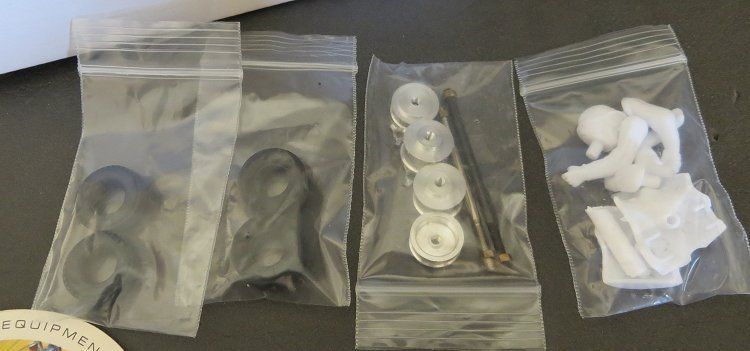
Wheels and tyres are 60’s style and axles are threaded 1/8th with threaded wheel nuts. At this stage it is advisable to check the axles in the wheels. I found the axle threads very tight about half way on, and fortunately, being a little bit old school, had a thread tap which I could clean up the hubs with. Note, the driver comes with two pairs of arms!! One long sleeved…..and the other, short!
There are several ‘small bits’ bags, make sure you don’t loose any parts while running through the pre-assembly stage.

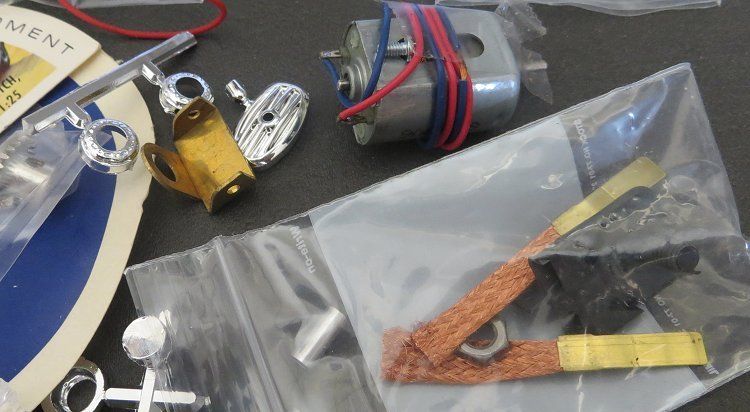
Once again, some more 60’s detail. The guide is a leading guide and is held in place with a single nut which relies on its tight fit on the guide to stay in place. Adjusting this requires a little care as if you leave it too loose, the guide will slop about a bit. The lead wires are poked through the two small holes in the guide and, after checking polarity, the braid aglets are pushed into the guide, trapping the wire ends, So, once all the parts have been identified, its time to build!
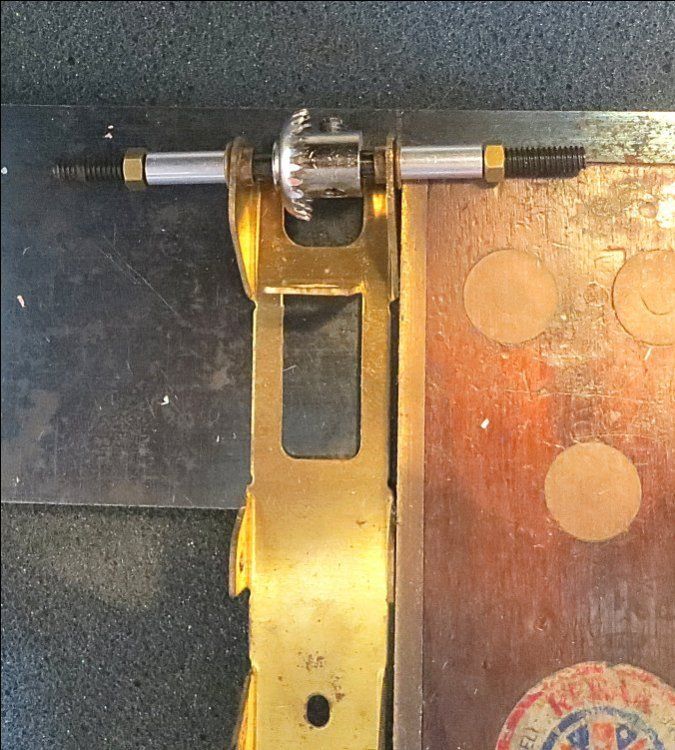
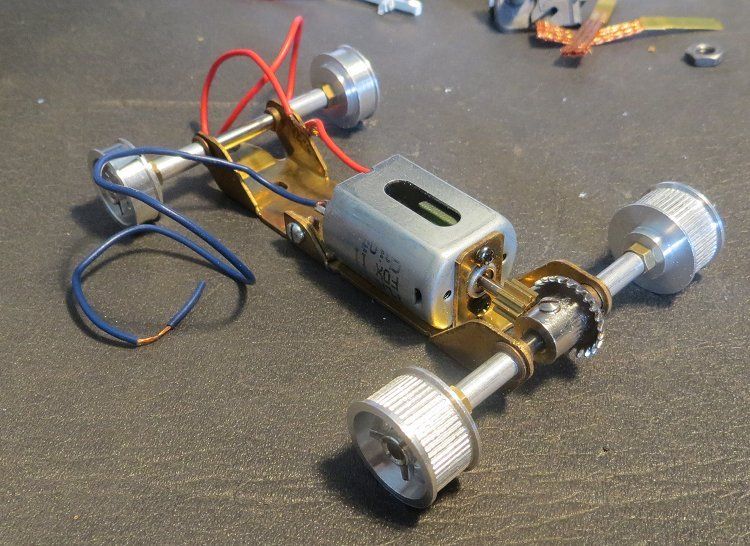
The brass chassis is soft and has not been bent with the greatest of care. On this model the assembled rear axle was out of square with the drive line. Some careful application of muscle will bring it back into line but then you need to check its squareness with the horizontal plane. Nuts and spacers can go on but must not be tightened against the ‘Oilite®’ bearings; a small almost imperceptible gap should be left to allow the assembled axle to rotate without hindrance.
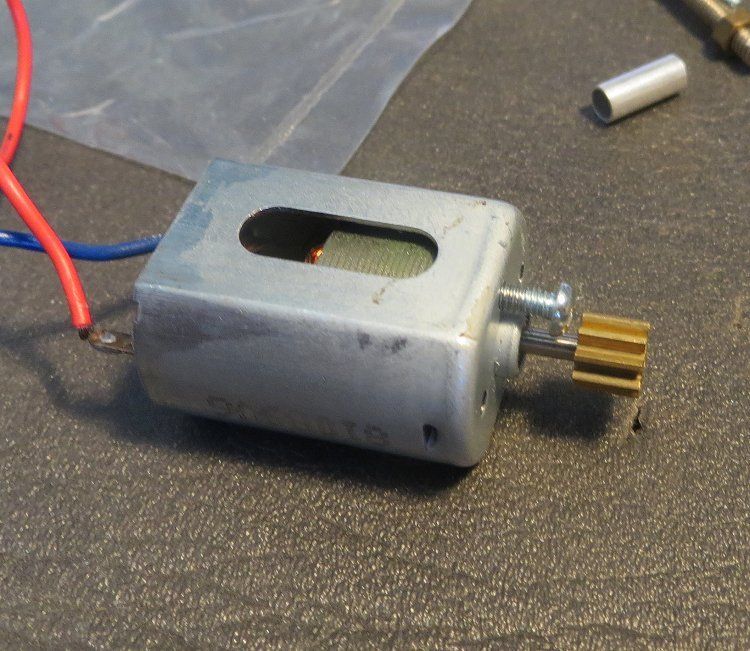
The motor is of the ‘Plafit’ type (Fox ll) and has plenty of grunt. This can be placed into its mounting on the chassis and the front mount installed.
The front motor mount is fixed on either side with a couple of screws and nuts, the problem is, these foul the body sides when you try to install the chassis, so just for ease of assembly and removal, I relocated the bolts through the bottom of the chassis (illustrated further down) where they hold the motor just as effectively without the interference.
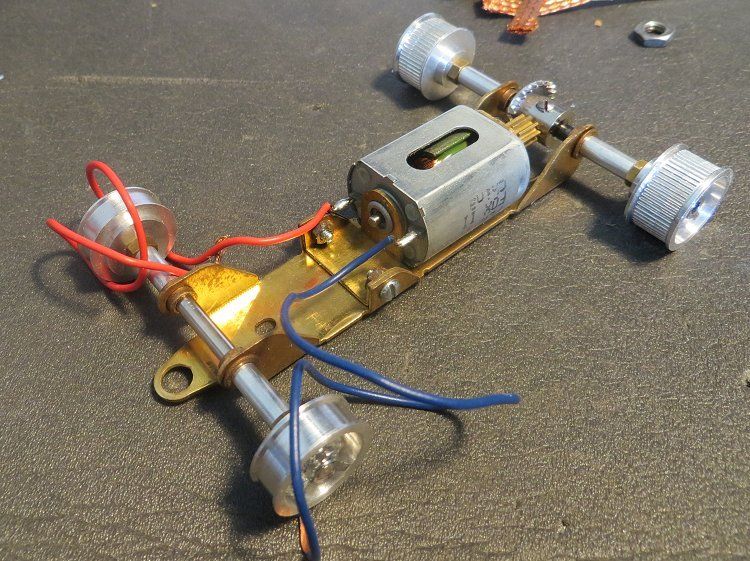
The front axle was assembled the same method as the rear and the wheels were screwed on. The wheels are screwed up until they barely touch the inner nuts. The chrome wheel hubs are removed from their sprues and placed over the wheel outer hubs. The ‘knock-off’ nuts are then screwed onto the axle ends. The knock-off can now be carefully tightened against the wheel ensuring it pinches the wheel hub. The chrome finisher should not have any pressure on it, or it will split. I used a pair of small pointed pliers to tighten the kock-offs.
Once assembled, the tyres can go on. At this stage it may be necessary to twist the chassis a little as you may find one wheel hanging in the air. This is due to the chassis not being in line. So twist the chassis slightly until all four tyres touch the set up block simultaneously. This may need doing later after the model has been run as it will wear the flash off the tyre and again present an uneven chassis. The guide can also be fitted as mentioned earlier. The kit comes with a selection of nylon spacers. One of these may be needed to space the guide down. Change the spacer size until the front tyres are just touching the surface of the set up block.
Now the body can go on to make sure there is nothing fouling anywhere.

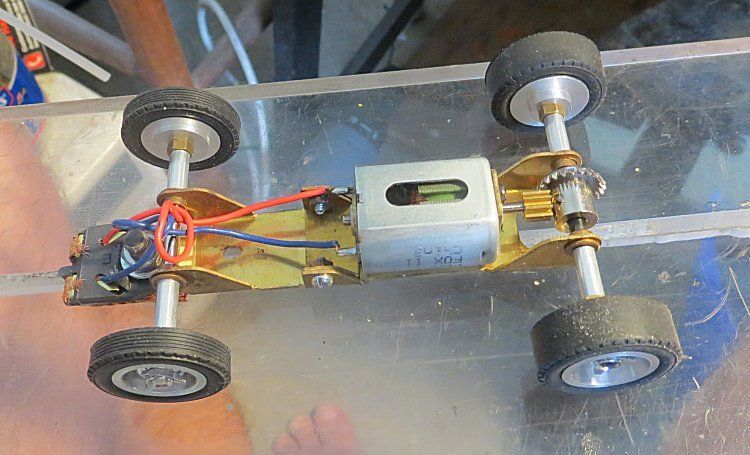
Underside shot of the two screws relocated into the floor of the chassis
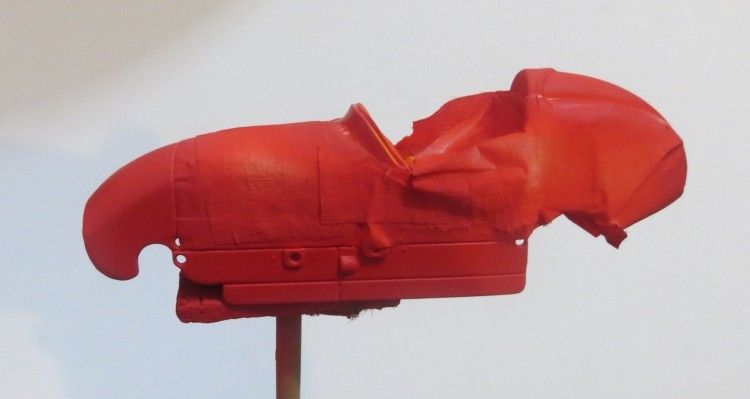
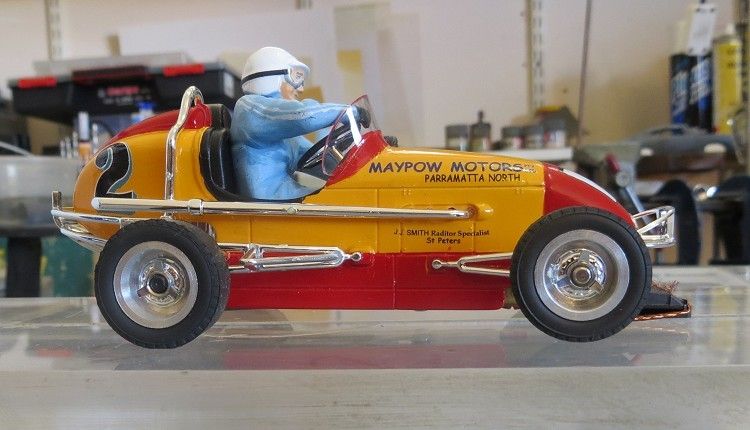
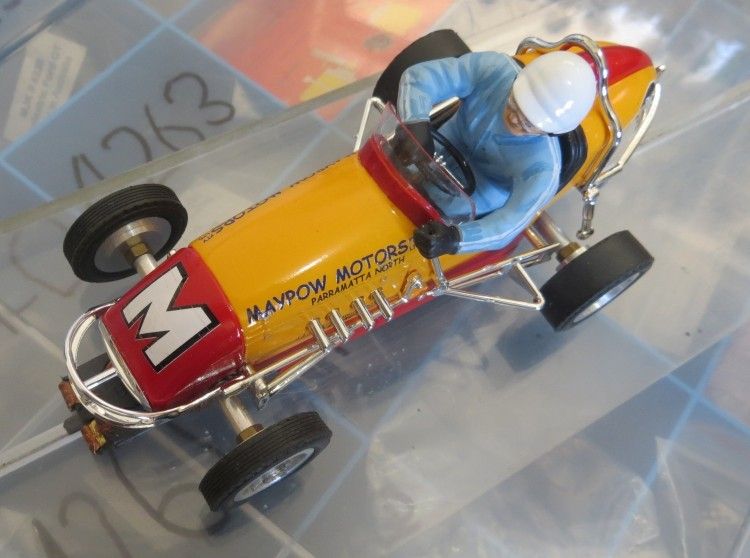
Next up we need to start painting. On the standard model it is a simple case of painting the body your chosen colour and applying the decals. On this model there is a distinctive livery of rusty yellow and red. The body will receive a coat of mixed flat yellow and a light rub down with linen to remove any nibs which have crept into the paintwork, then it will need to be masked up to take the second colour.
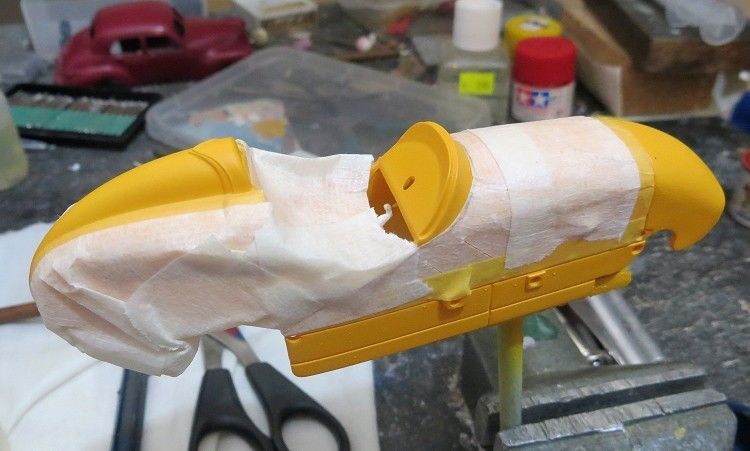
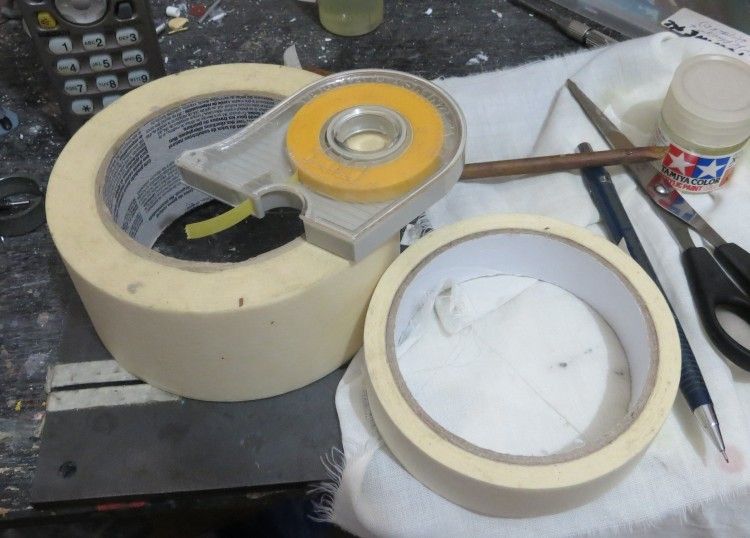
Initial masking is done with Tamiya narrow masking tape and then the wider masking tape is stuck to this. The edge where the colours change will then need a thin coat of clear enamel along the join. This will stop colour bleed showing through the joint when the tape is removed.
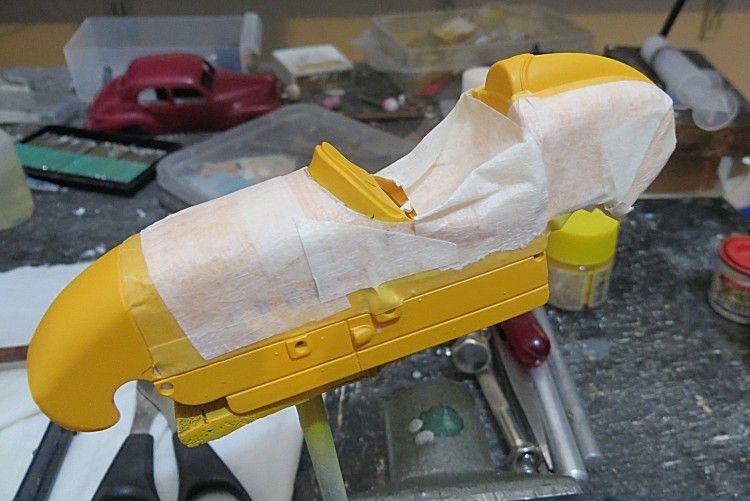
Make sure you cover all the parts that you don’t want to get the wrong paint on!
The model can then be sprayed with the second colour. I usually leave the second coat about two hours. This will ensure the paint has dried but is still flexible. We want the paint to tear evenly when the tape is removed. If the paint is allowed to dry for too long, you run the risk of the masked paint edge tearing unevenly!
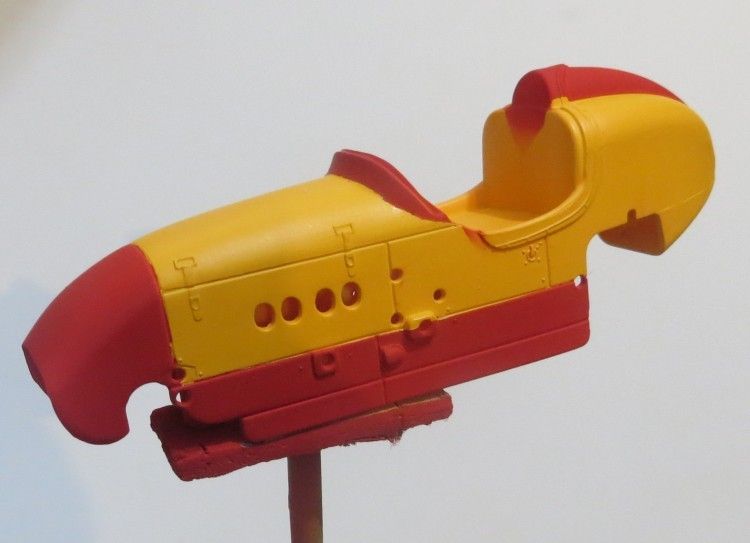
Some parts of the model will be getting a brush coat of matt or satin colour. I don’t worry too much about masking this a 100% as the semi matt / satin paint will cover it in two brush painted coats.
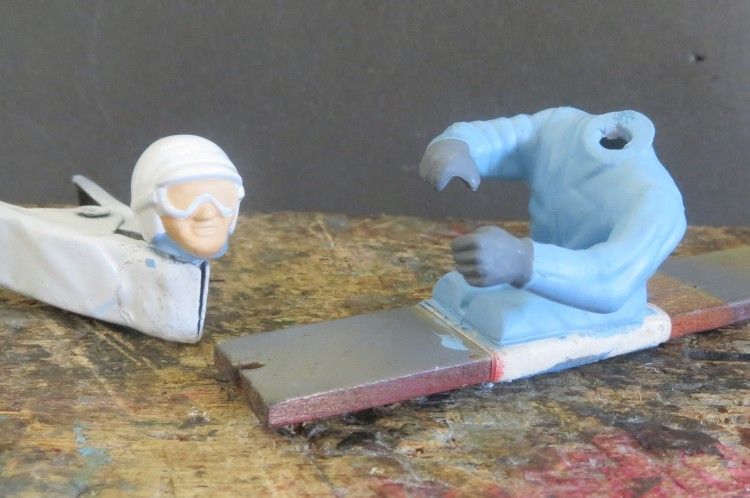
The driver had previously been set up in the cockpit and arms and steering wheel set in place. The arms were glued but the wheel left free for obvious reasons. I also like to leave the model’s head ‘til last as I can ‘pose’ it on the finished model just for some extra effect. I have also opened up the hole where the neck will go. This will allow the head adjustment greater movement when the time comes to fit it.
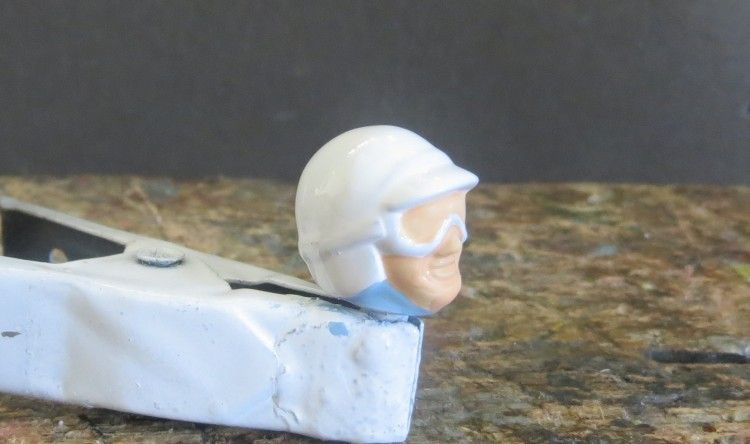
Painting faces has never been my strong point so what I have done with the head it to spray it in flat grey acrylic. I then sprayed the whole head in gloss white (helmet colour), and then gave it all a coat of clear gloss enamel. Finer detail was applied with a fine brush and anywhere I am too heavy handed (eyebrows in this case) I can fine tune them with the brush painted flesh colour and reduce their size.
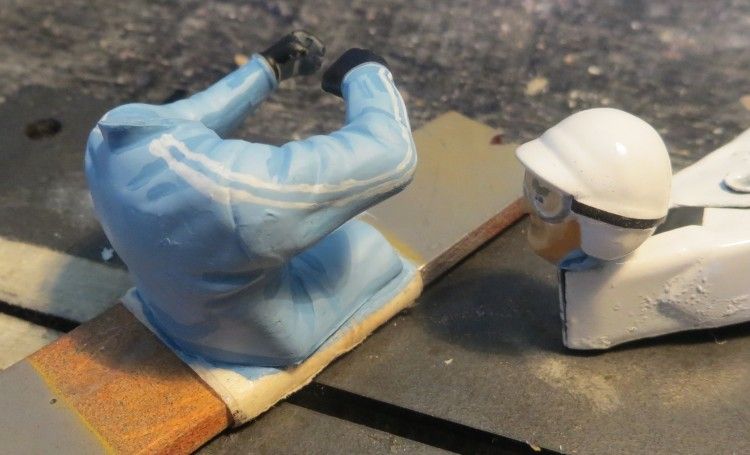
The driver’s body also started off as flat grey acrylic and the blue was mixed to an acceptable shade. A bit of shadowing was applied and finally the sleeve stripes were applied very carefully. Again, if you smudge or over paint, you can trim up the lined and other detail with some more brushed blue! The best bit was the goggle strap. I brush painted some satin black enamel onto some decal paper, and once dry I cut a thin strip of colour from the paper. A few minutes in the water and the band was applied as a decal!
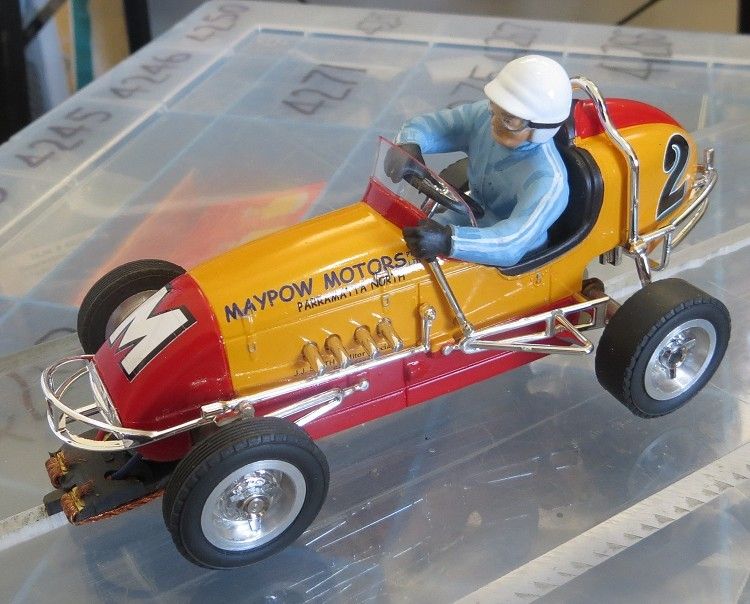
Approaching the finish, I had the decals and the chromework to do. The decals were sourced from good friend Ian Goodland of MJK fame. His compadre and fellow MJK’er Michael created the decals from some photos I received from the model owner. There were two sponsor options, the other being BERCO engines, who was also a Revell sponsor. The body had its first coat of clear enamel and once dry, the decals were applied. After this there were two more coats of clear applied to give it that special sheen.
Once again, the chromework around the cockpit goes on in a certain order so make sure you have got this right. Also, don’t forget to remove the anodizing on the parts that go into the body and have to take glue! I carefully scraped the chrome off with a sharp modeler’s knife. I also opened out and tested all the holes that the chromework goes into. We don’t need to apply excessive pressure to any of these parts.
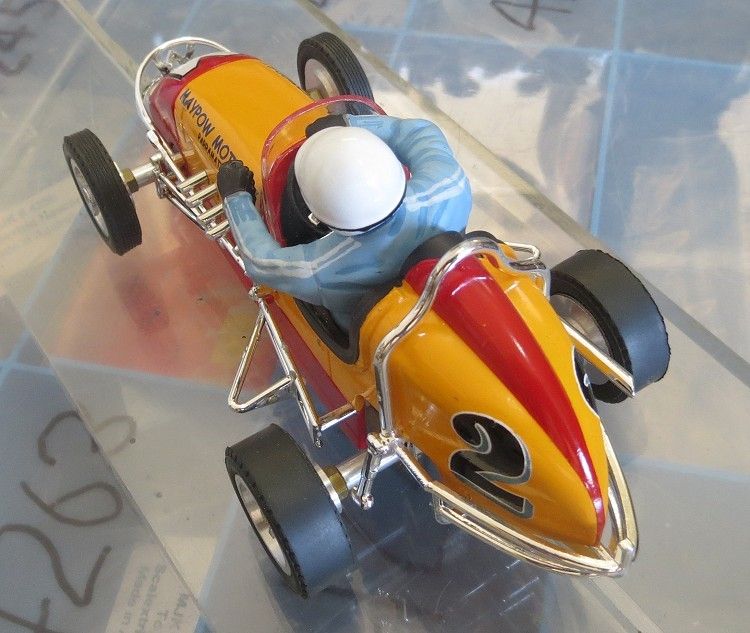
The most difficult chrome piece was the roll bar which went on first. The roll bar is designed to be fitted with the body minus its undertail, but with a painted model this was going to prove impossible. With the undertail in place it is a stretch to get the bar in place. My solution was to cut off a lug on one side to give it more movement. The roll bar has to be modified anyway (see kit instructions) by removing parts of it to allow the chassis and axle to fit in the body. All the anodized parts were glued in place by using liquid polystyrene cement applied with a brush to the insides of the model. Again, once dry (overnight), the pins were trimmed on the inside where the motor was expected to slide in.
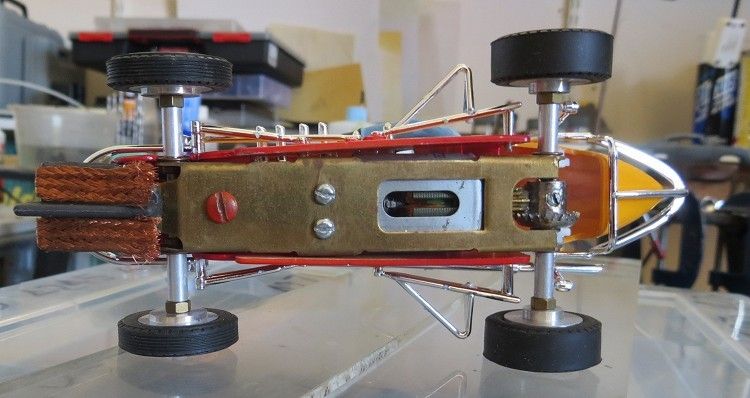
The completed underchassis with the huge retro braids!! If this was my model I would have made one or two alterations, especially to the guide. It would have been nicer not to see the guide sticking out the front in my view.
As mentioned before, the driver and the wheel need to go in too. Again, a couple of dummy runs saw me trim the wheel shaft to about half length. And I developed the technique of sliding the two in place simultaneously! Come the real thing, I lightly scored the driver’s butt and the seat cushion, and applied extra strength epoxy to it and him! Once all was in place I held the wheel in position with bluetac and applied more epoxy to the steering shaft under the body.
Almost there, the brake lever was placed in position and clamped to the driver’s left hand. Lastly, the screen was trimmed and fixed in position with extra clear epoxy. You get seven or eight minute grace with this glue before it stiffens, so don’t rush it…. but don’t mess about!
All that’s left is some track time, but something like this should be good, and apart from possibly some braid adjustment, I fully expect the model to be a reliable goer straight from the box! The only other thing left to do if this was going to be raced seriously is to true the tyres on a truing machine, not just sanding them, which isn’t 100% accurate. Because of the anodised bits, the single body mount and the flexibility of the chassis I recommend you aren't too reckless when driving this model. It will last a lot longer by slowing up a couple of tenths!
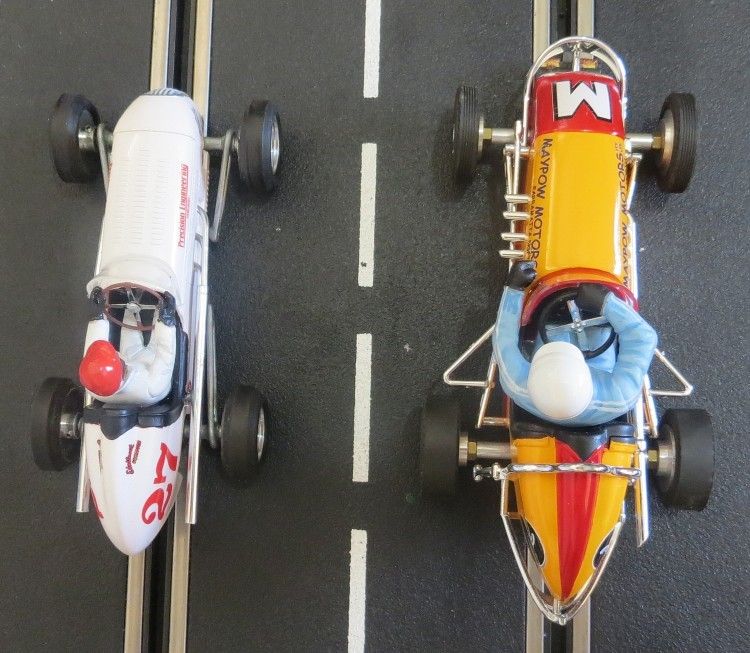
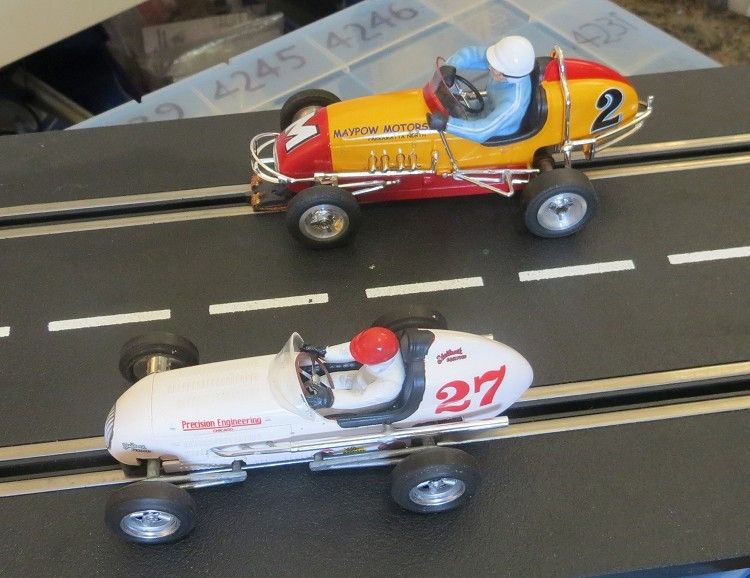
The left model is the Revell 1/25th model and the right is EJ’s 1/24th. The jury is still out regarding which is the correct scale.
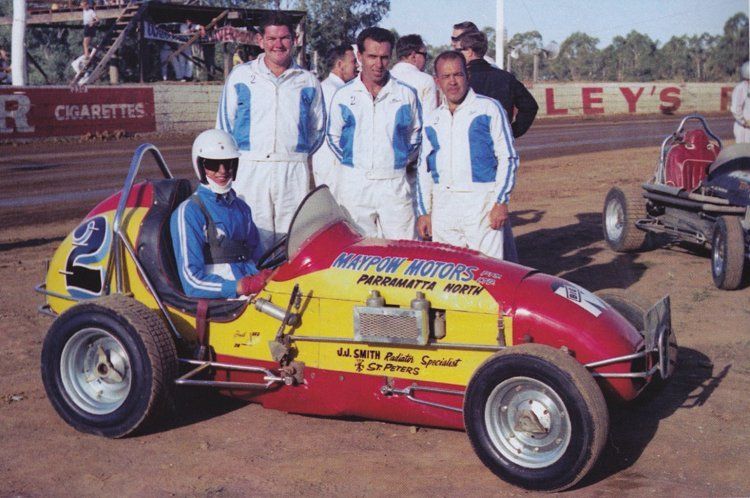
Howard Revell and the subject matter. Several differences, but a memorable piece of Australian dirt track racing history
So, once again, a fabulous model and a great excersize in cooperation and exchange of knowledge. It is my understanding that there may well be a knock on effect seeing as the model has some local relevant decals! How many other Aussie dirt racers out there waiting to be immortalised in plastic and paint! Mmmmmmmmmm?
Many thanks to Steve Magro QLD for the opportunity to build the model for him and well done Ian and the boys at MJK for the decals.
