.
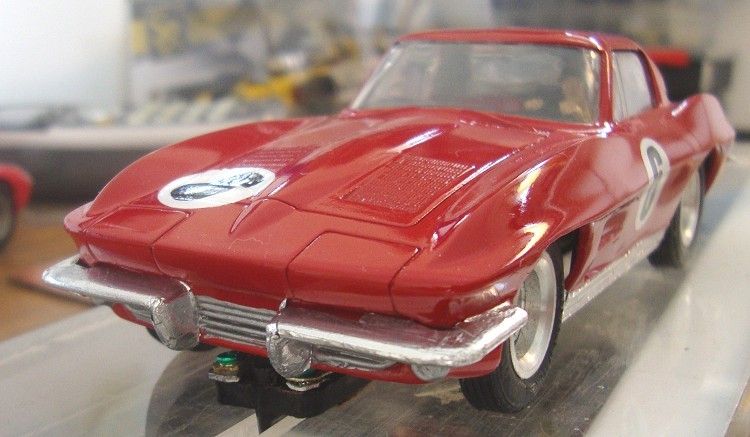
60’s Revell Corvette Renovation
by Phil Wicks
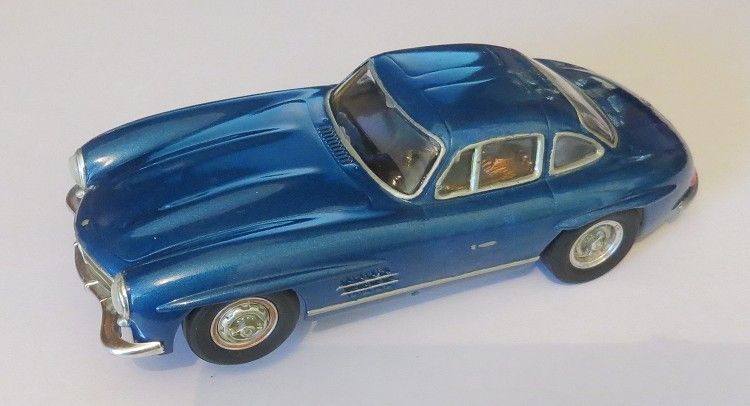
For a long time now I have been hankering over a nice Stingray, I have a few offerings as made and issued by Monogram and Carrera but I realized after a year or two that that was not what I was looking for. Unbeknownst to me, I was looking for something raw and basic, but still had that Stingray mystique about it. Once I had realized it was the 60’s Revell Stingray I was craving, I set off on an eBay marathon. But it wasn’t any old Stingray, but something that was going to mean something when it was finished. Something that had a bit of blood, tears and sweat with it.
The optimum wasn’t too long in coming along, A rather battered and bedraggled Stingray which had suffered at the hands of an errant schoolboy some fifty years ago, and which had been waiting in a dark place until a Samaritan would tend it and set it back on its way. Most owners of this model on eBay know what they have, and even if they wait an eternity they are prepared to sit it out, relisting and relisting until hell freezes over…….. or so it seems! It was looking like I was going to have to pay the price or forget it, but……
A visitor to the “Outhouse†contacted me saying he had a box of sixties slotcars he wanted to get rid of. So, a time was made and a meeting was duly attended and to my surprise a retired local gent was selling his lifetime collection of US style slotcars. Among the assortment were Cox 1/32 and 1/24th, Strombecker GT40’s, Daytona Cobras and a Cheetah! There were also some very nice Monogram Ferrari 250 LM’s, but all were in severely played with condition and all would need a large bucket of TLC to return them to a cherrishable condition.
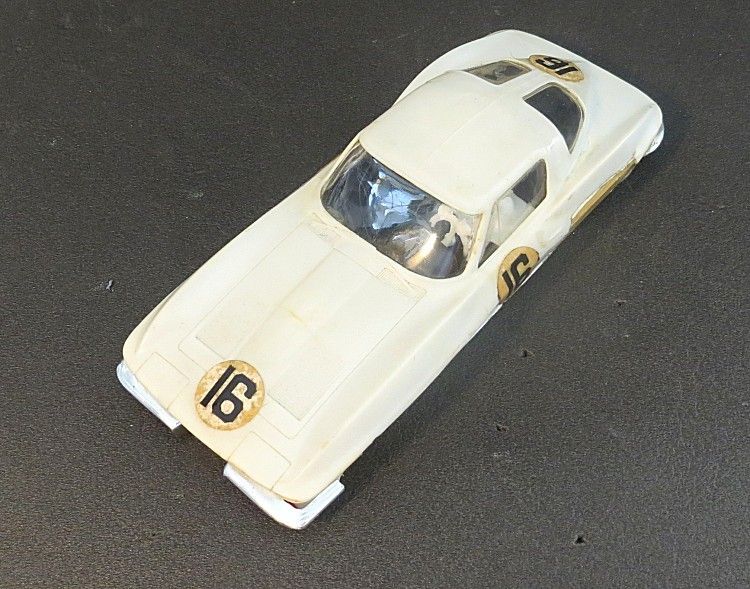
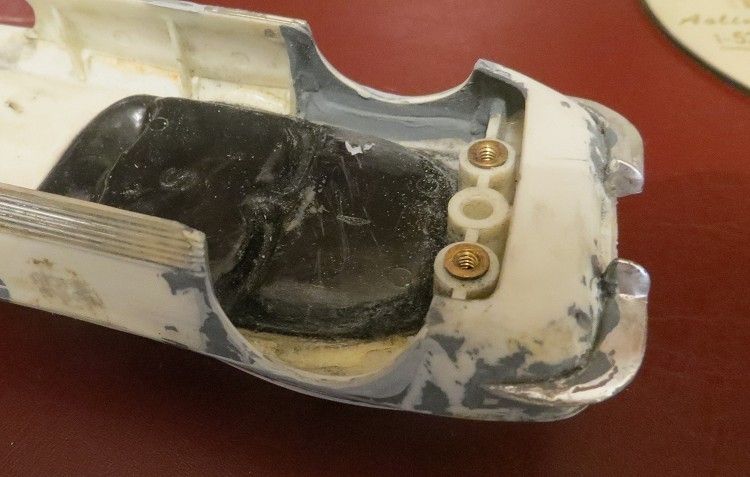
But among the odds and ends and countless loose wheels, axles and tyres, pit figures and motors and chassis was a white Stingray which must have laid half concealed amongst the dross of many years. Picking it out it was immediately obvious that it carried the scars of schoolboy zeal and ignorance. Both rear wheel arches had been hacked away with what could have been a machete. Clear window parts had been stuck in with what must have been at least half a jumbo tube of polystyrene cement, leaving a transfixed polystyrene waterfall down the inside of the screens, front, side and rear.
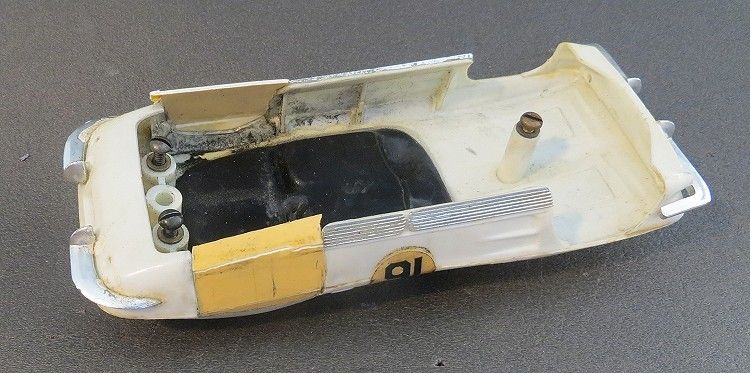
The chrome parts were almost devoid of their anodising and sill trims had lumps missing out of them. Another challenge to come were the quarter bumpers, they had been stuck in place using the remainder of the tube of glue no doubt! The driver’s tray must have seen the opening of a new tube as this too was fixed tight with no visible sign of it ever coming out without a fight! Fortunately, the front of the model was only in serious condition, which gave me some hope for restoration. The issues arising from the over use of glue were that it was going to be very difficult to remove the clear parts to paint the body, it was also hazardous to remove the drivers tray but it was eventually achieved without breaking anything.
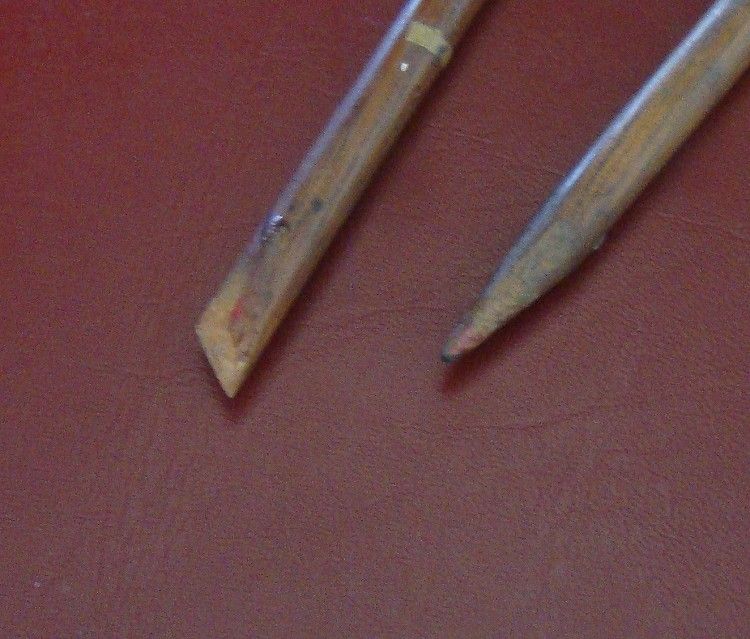
This had to be done to access the inside of the window parts, without this access the ‘glass’ could not be cleaned. I eventually scored around the join between the driver’s tray and the body with the back edge of a modeler’s knife point. After some time it was eased carefully from the body. The other big plus apart from accessing the screens was access to the driver’s tray. This meant the driver and interior could now have a fresh coat of paint after it had been tidied up.
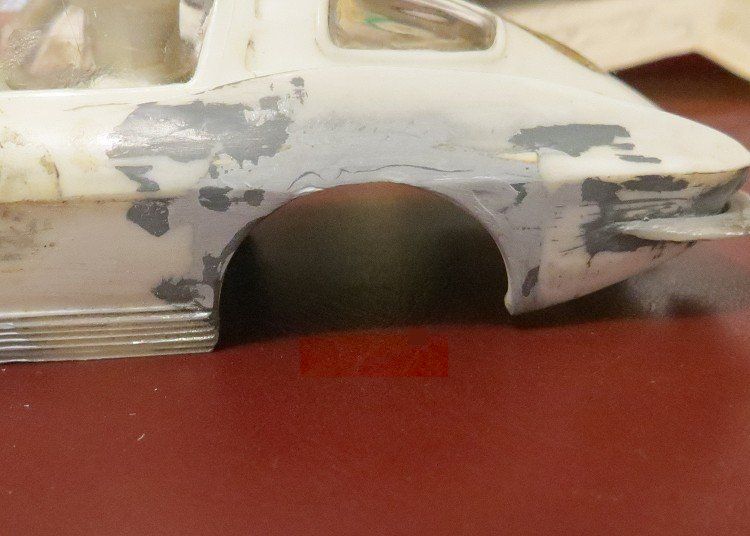
Once disassembled, all parts were evaluated and thankfully all were reusable. The body was rubbed down inside and out. The panel moulding lines were cleaned out with a modeller’s knife and stock was taken of the massive cuts to the rear wheel arches. Fortunately the rear arches are more angular than flowing so I decided to close them completely and recut fresh arches. The gaping holes were tidied up and made more of a regular shape, this would help me fabricate the new sides to go in the model. Some 1.0 m.m. plastic card was cut to as close a pattern as possible. Once the desired shape was achieved the parts were glued in place. Once dry after a couple of days, the inner and outer arches were treated to several layers of Tamiya body putty, applied thinly and rubbed back between layers. Eventually the contours of the rear arches were achieved and some grey primer was painted on the repair and rubbed back to confirm the finished shape of the
arches.
Next, the screens were delicately scraped back to remove a considerable amount of glue. Once scraped clean they were rubbed back with wet 600 grit wet & dry paper and then, washed off and rubbed back with 1200 grit wet & dry, taking care not to ruin the plastic body recess edges. The next job was then to clean the clear parts withTamiya ‘fine’ plastic polish, this was applied with a cotton bud and was rubbed in for quite a while, refreshing the polish, till the shine started to reappear on the ‘glass’ pieces. The body was then washed off with warm water and a little washing up liquid. The final treatment was to apply, again with a cotton bud, some ‘Silvo’ silver cleaner. This is a very mild liquid abrasive and used properly will remove any remaining haze from the clear parts left after the fine paste buffing.
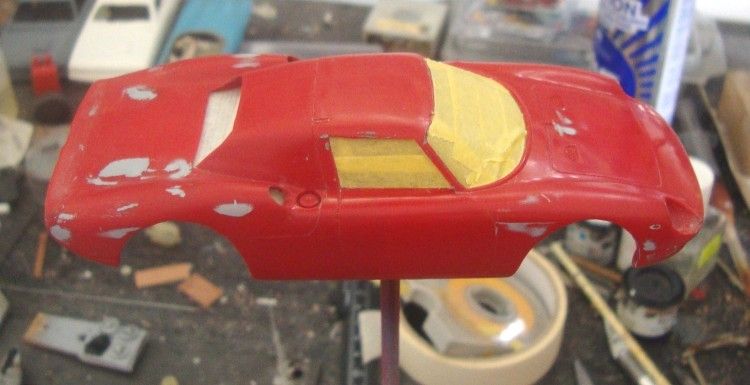
With the unremovable parts cleaned the next job was to paint the body, but because the screens won’t come out I had to mask them. Again, there are pitfalls here if you don’t pay attention. The pitfalls being that if you mask the windows then spray several coats of paint and clear on it, when you come to remove the masking tape it is odds on you will ‘tear’ the edge where the masking tape sits in the recesses against the body, this will leave a noticeable jagged edge which will infuriate you and leave the model looking unsightly! My solution was to apply the primer and the first colour undercoat, matt red. Once dry (overnight) the join at risk is cut with the tip of a very sharp modeller’s knife, preferably with a new blade, this will create a sharp edged release area leaving the window/paint join very crisp. This was carried out after the gloss coat and after each of the several clear coats. Note here that the windows have to be masked on the inside too! This is because the overspray from body painting will permeate any unprotected areas.
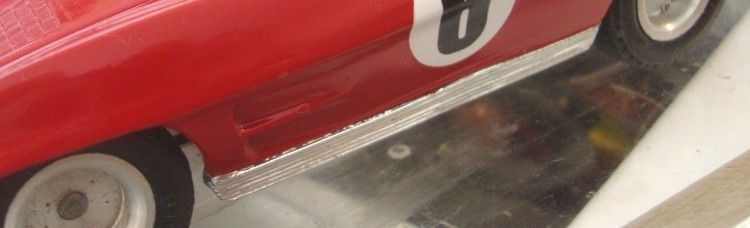
Another issue as mentioned above is the loss of chrome from the front and rear quarter bumpers and the sill trims. Firstly the excess glue was scraped from the bumpers and fettled until they looked the business. Somehow, the sill trims had received some savage blows at sometime in the past and left a couple of gaps in the ribbing. Mmmmmmm? I decided to putty the damage up with Tamiya body putty and after having dried for a couple of days I carefully sanded the putty down till it was flush with the surface of the ribbed trims. I then took a sharp triangular hobby file and slowly and carefully filed the putty until it matched the profile of the trim using the existing ribs as a guide. With the body painted and the bumpers and trims now fettled I decided to ‘rechrome’ them with some bare metal foil!!! Ambitious indeed as I have never undertaken such a big or awkward area before!

The side trims proved to be easy and after cutting a leaf of BMF I applied it to one end of the trim and spread it along the trim using a small stencil brush, and burnishing it till it was as smooth as I could get it. The bumpers were a little harder (a lot harder actually!) I tried a couple of ‘wraps’ but there is not the flexibility in BMF that I would have liked. I eventually concluded that the underneath should be done first, then, the top could be done, making the BMF leaf big enough to wrap around the edge of the lower foil. Still a hard job but I eventually after several false starts got the bumpers covered, and I proceeded to burnish the foil areas with a piece of hardwood quarter dowel sharpened to a point at one end with a pencil sharpener. I then brush painted them with a couple of coats of Tamiya clear gloss enamel which improved their looks five hundred percent.
The drivers tray was renovated and everything inside the model got a coat of paint. Later in the rebuild and once complete the tray was reglued inside the body, only this time I only used a couple of spots of superglue to hold the initial fixing, I then painted some extra strength epoxy resin (Araldite) along the drivers tray edges just to hold it in place. The model topcoat was finished and all that is let to do is to paint in the finer detail like the badges and the screen trims, but I am practicing a new technique for doing this on an old body, and have not mastered it yet! So you’ll need to call back to see how I managed.
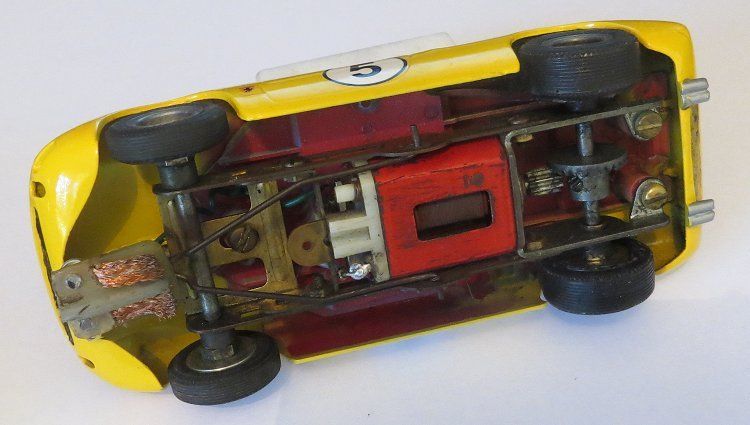
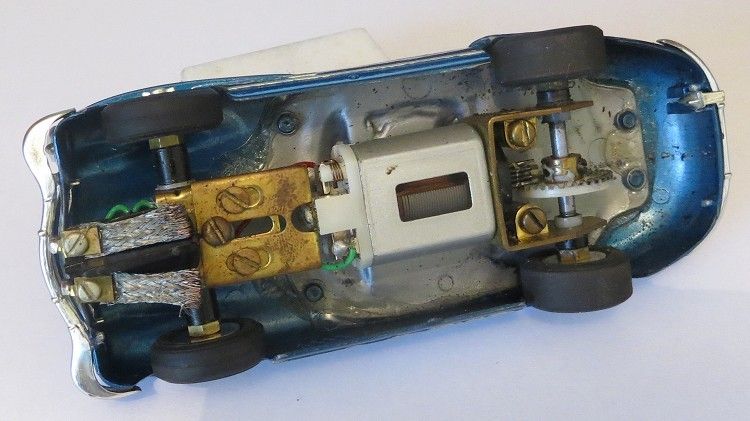
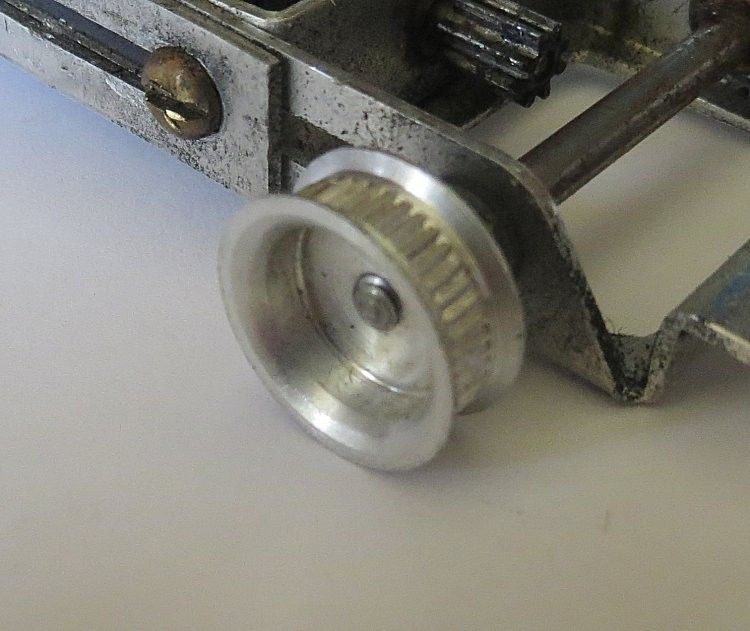
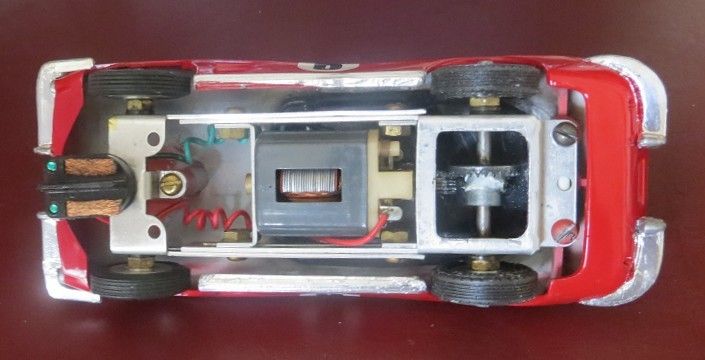
Fortunately the chassis was almost complete and very little needed to be done, so a scrub down and a service saw the chassis running as good as when it was new. There were odd wheels on the rear but fellow slotracer Steve Magro helped me out from his extensive collection of sixties spares. A matching pair were found and fitted and the last challenge was the tyre. I already had a pair of old fronts which I cleaned and put back on the front. The rears were purchased from Paul Gage of Canada who makes a vast range of classic and modern tyres.
Paul Gage Tyres
Painting has always been a dilemma with me, too many coats and the model ends up with that ‘Tonka’ look where fine detail is lost and the model generally looks a bit bulbous, too little paint and sometimes undercoats show through leaving the model a bit patchy when painted with yellows or reds. And the dreaded orange peel is ever present. Another dilemma is ‘is it going to be raced?’ If the answer is yes, too much paint and too many coats may give a desired glossy sheen but, if applied too thickly will chip on impact with most other objects (including scenery)! So a decision has to be made.
I painted this model about ‘middle ground’ i.e. Not too thin a coat to leave a dull sheen, and not too much that it will chip easily. Once all the essential parts had been prepared or glued or polished and the masking was complete the painting went like this.
1. Coat 1 A moderate dusting of Tamiya grey enamel primer to reveal surface defects
2. Repair defects and re dust them, not too thick but enough to cover the model well.
3. Rub down all painted surfaces with coarse linen (bed sheet/pillow case type material.
3. Apply base undercoat (Tamiya enamel flat red). Enough to cover but don’t swamp the detail, door lines, grilles etc.
4. Rub down firmly with coarse linen.
5. Apply colour coat (enamel gloss red)
Note* Special attention to the order of spraying, this must be carried out the same as a real car would be painted in a spray shop. This is to avoid over spraying an area causing runs to develop.
1. All wheel arch reveals (where the inside of the arch meets the outside)
2. Window reveals (where inside meets outside)
3. Rear valance (under the rear bumper)
4. Front valance (under the front)
5. Left sill (side below the left door)
6. Right sill (side below the right door)
7. Front (from the bumper to where the bonnet starts)
8. Rear (From the bumper to where the boot starts)
9. Turret (roof) paint from side to side
10. Bonnet, side to side
11. Boot, side to side
12. Left side
13. Right side
The reason we use this order is to remove the risk of spraying above wet paint again encouraging the paint to run and to avoid orange peeling existing wet surfaces! Whether you use a spray gun or a spray can will affect the amount you spray on and the distance you spray from. Spray cans tend to need 20 to 30 centimetres spray distance, making passes in one direction with the colour coat barely overlapping. If you are lucky enough to have a spray gun set up you may well have the luxury of an adjustable paint feed screw, this will allow you to control the flow of paint from coarse to fine adjustment.
When the red undercoat is dry, rub back with coarse linen to remove the rough texture of the matt finish and then apply the top and only gloss colour coat. The paint spray needs to start at one end before it reaches the body, and in a continuous movement pass along the spray area and off the other end of the body before releasing the spray jet, this will eliminate spatter to the paintwork at either end of the model.
The first clear gloss coat now goes on and again is left to cure. The gloss coat does not get rubbed down! providing you have put on a nice even finish. At this stage I put on the few pre-coated decals there were; painted any silver areas like the font grille and applied the Bare Metal Foil. It is also at this stage that the window masking is removed. The masking should pull away cleanly if you have been scoring the joint properly. The masking tape adhesive will need cleaning off the screens to leave the clear parts immaculate
Again after a suitable period the model, including the windows, then gets its next coat of clear enamel, not too thick as this can cause the decals to crinkle. Once cured, this clear coat gets a light sand with 1200 wet and dry making sure you don’t press too hard over the decals. This is to remove any small pimples or dust settlement that may have occurred during the spraying process. Over the next couple of days the model got two more coats of clear, the third also having a light sand but the top coat should be as it comes from the can or gun.
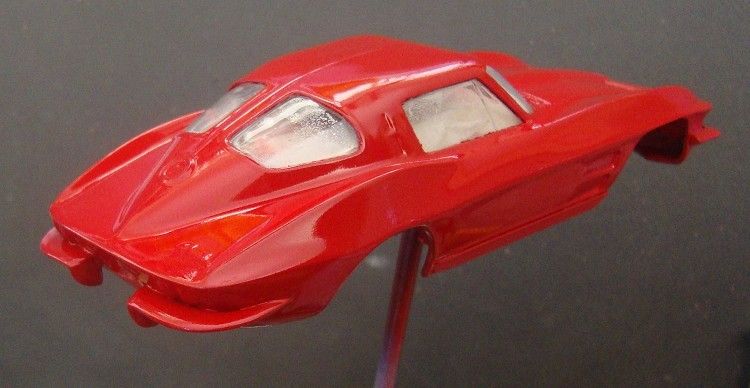
You will notice that during the painting period I like the model to be mounted on a ‘lolly stick’ contraption, this allows me to rotate the model through any angle to aid access to the spraying areas, but its greatest use is that after each successive coat is applied, I can rotate the body on its side slowly for a couple of minutes until the paint starts to gel, this discourages paint runs if you have been a bit heavy handed, especially with the spray can.
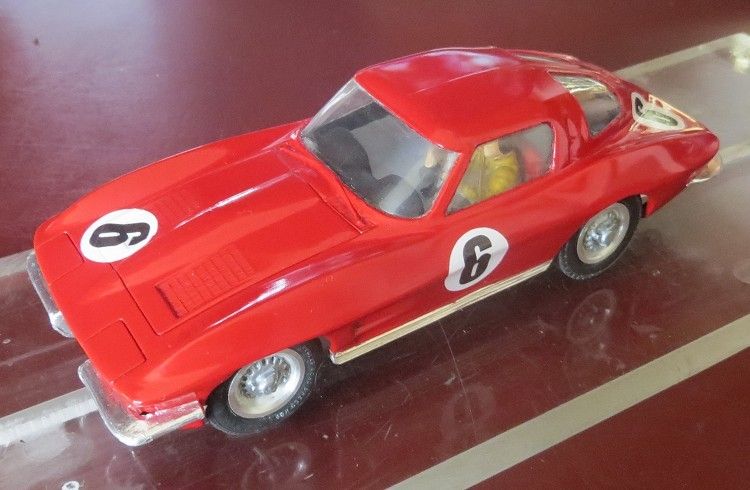
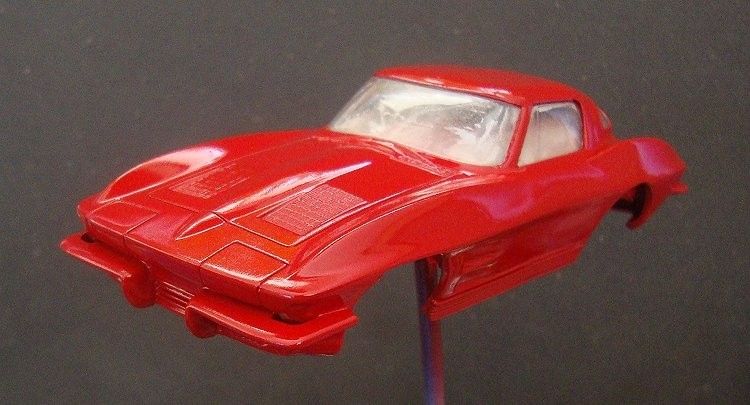
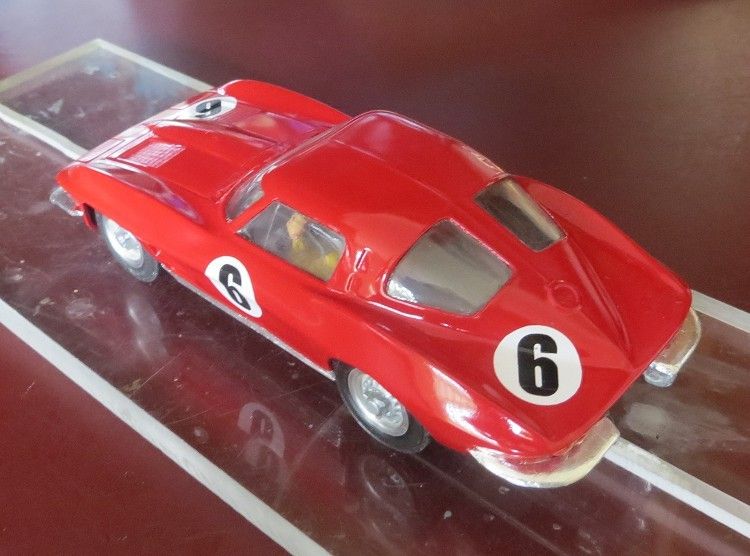
So what do we finish up with ? well, it is a very old school model and no amount of body work will change that; decal bombers might cover the model from stem to stern leaving little visible proof of a colour coat; but whatever happens you can rest assured you will be very pleased with this little piece of slotcar history which has been brought back from extinction at the edge of the junkyard and which now sits proudly among its peers on the best shelf in the house!