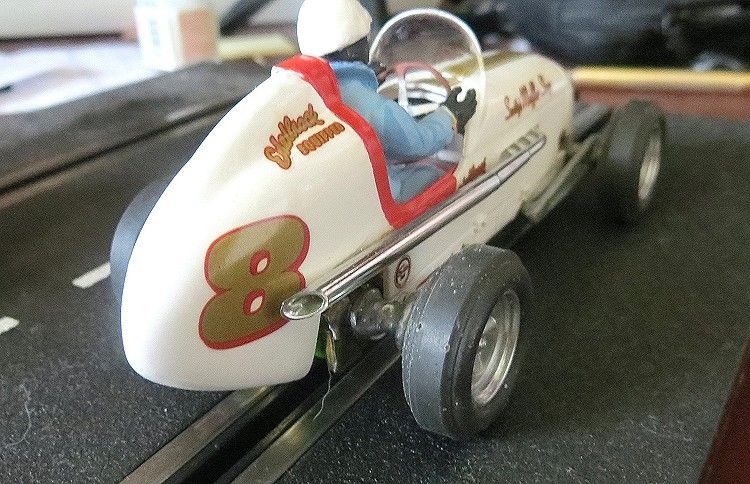
Kurtis Midget Racer
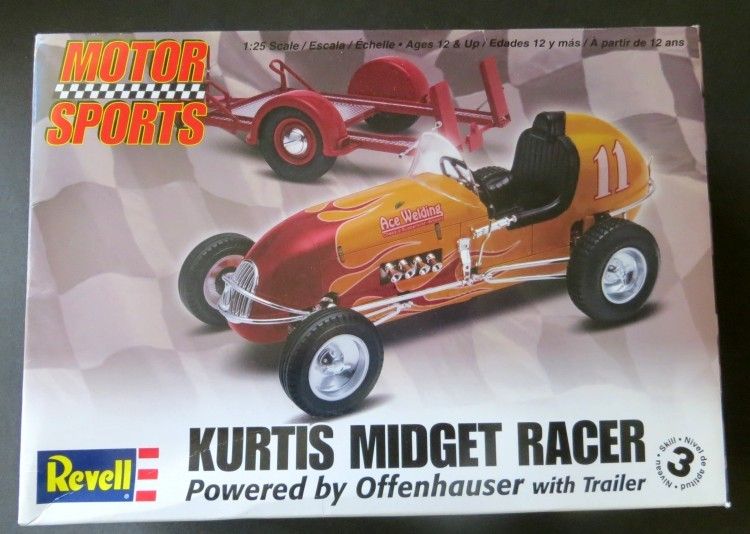
By Phil Wicks
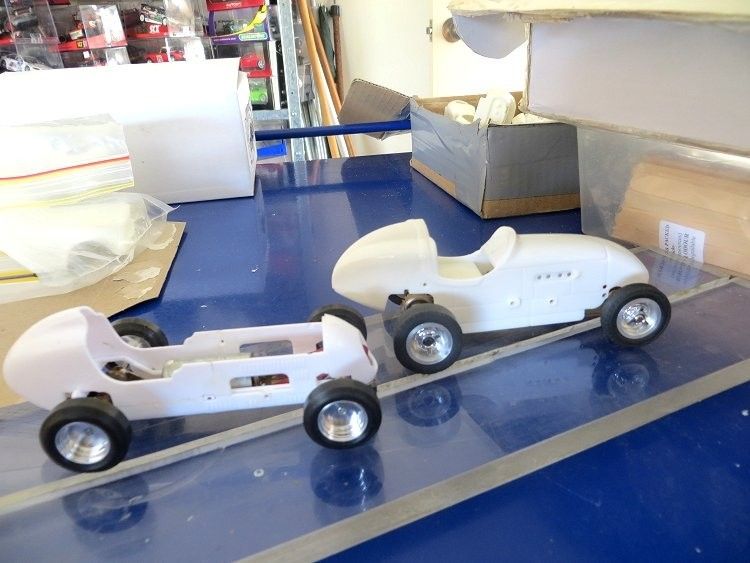
This was a quite-by-chance event which took place after a brief discussion on the viability of motorising a kit, with fellow slotracer Greg. Soon after, two kits were on their way to his home and then to my place for appraisal, and then assembly. After a couple of false starts trying to devise a home made chassis, firstly in PCB and then in brass, I considered it was all too hard and some little time later took to the internet to find a ready made chassis to fit. First thoughts were one of the chassis from the sixties, Monogram, Atlas, MRRC etc. Any one would fit but the trouble was they were bulky, and had bulky motors and bulky running gear!
There would have been chassis bits sticking out of the body everywhere and in the end would have looked, well….very…..retro! Not to be beaten, I looked for several more days until I found something I had previously overlooked…..more than once. This was the range of Penelope Pitlane chassis as sold by Pendleslot (UK). I say overlooked as I had already looked through their list of chassis’ and come to the conclusion they were all too wide, except one!....the one I overlooked! I promptly ordered couple and ten days or so later they were in my hot little hands! The rest of the story I can tell mostly in pictures, so read on.
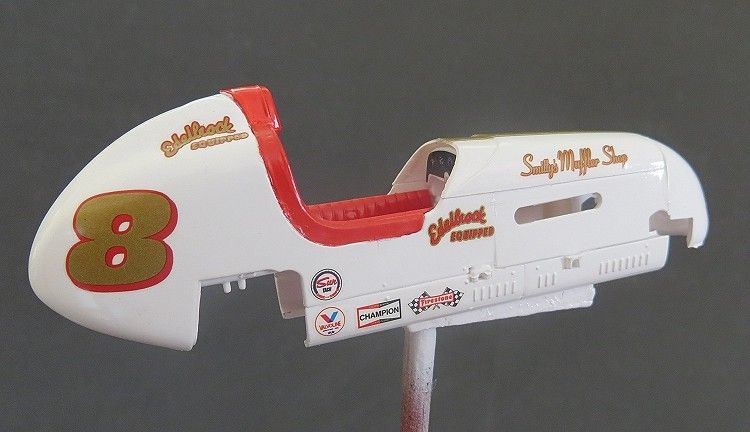
Primarily these models were bought for the track, hence, the true scale modeler will see some glaring anomalies and detail omissions. These were done because these details were going to have a limited life (measurable in minutes) in the cut and thrust of the race track, and secondly, some of the decals which run up over the bonnet of the model would not lay flat on the corrugations of the moulded cooling louvers, so I left them off altogether. The rest could be included and that is what I have done, with the following results……hope you like them!
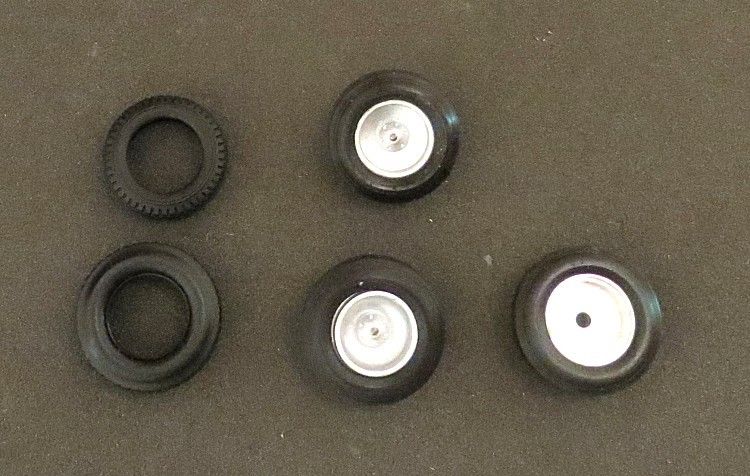
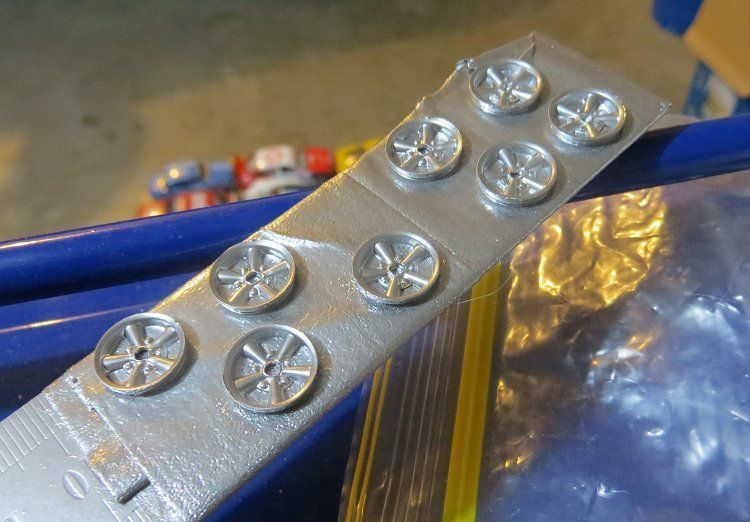
The first issue was to get some scale wheels and tyres, I didn’t even attempt to get copies of the dished wheels of the , so I went straight to some very attractive American five-spoked alloys.
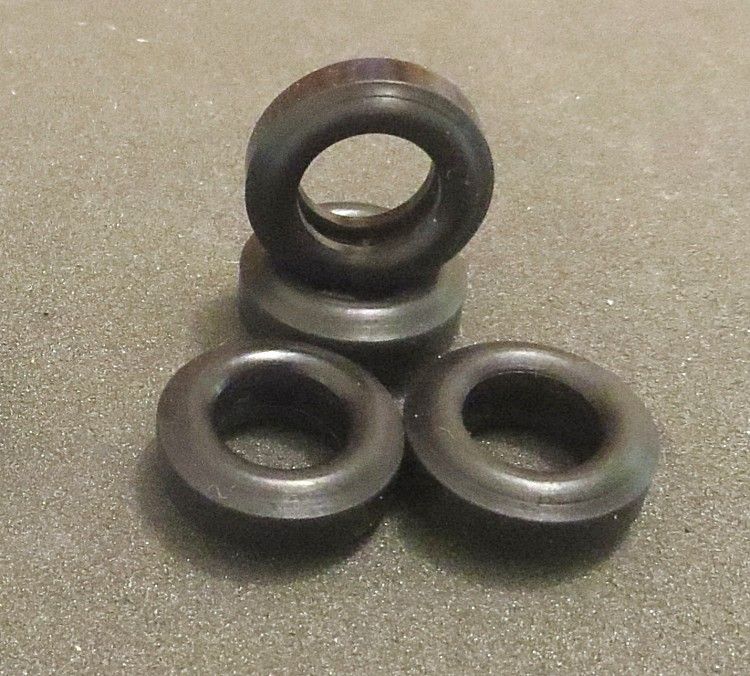
I sent the new rims and tyres to Paul Gage in Canada who promptly sent me some very nice 50’s style tyres, rears being marginally bigger than the fronts.
Paul Gage Tyres
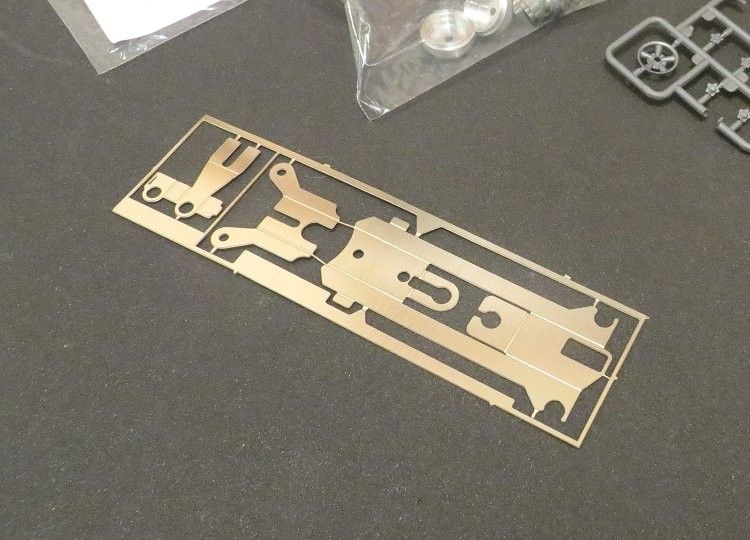
As mentioned earlier, I tracked down an ideal chassis at Pendleslot and other stuff to fit the model. (Pt. No. PPSK1s)
Pendleslot chassis
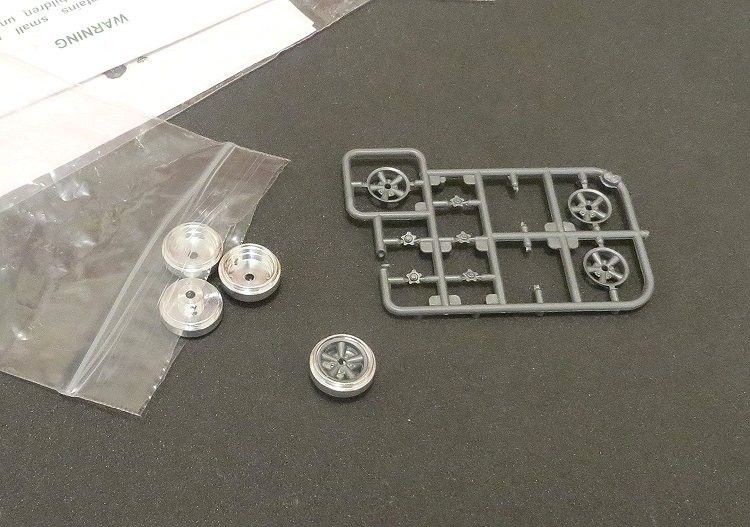
Wheels and inserts also from Pendle’s (Pt. No. 32166f)
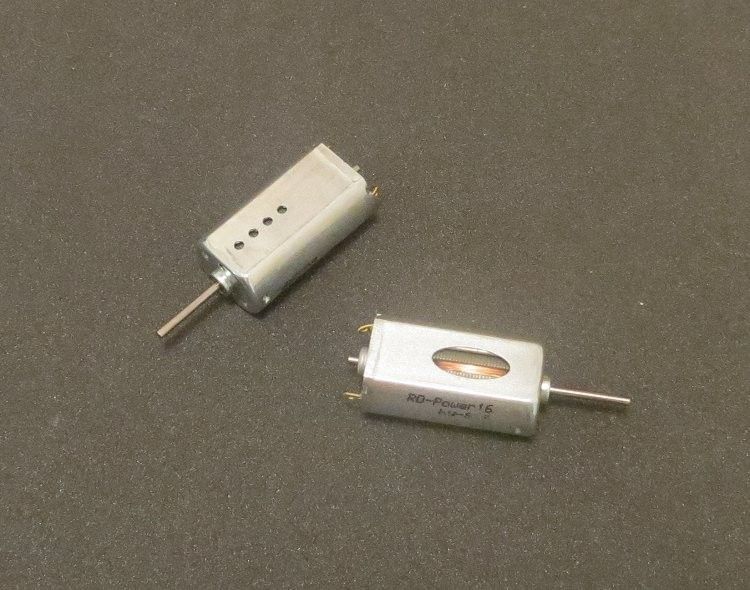
MRRC 16,000 r.p.m. (@12v) motors, also from Pendle’s (SR181D41600X-b)
Pendleslot motors
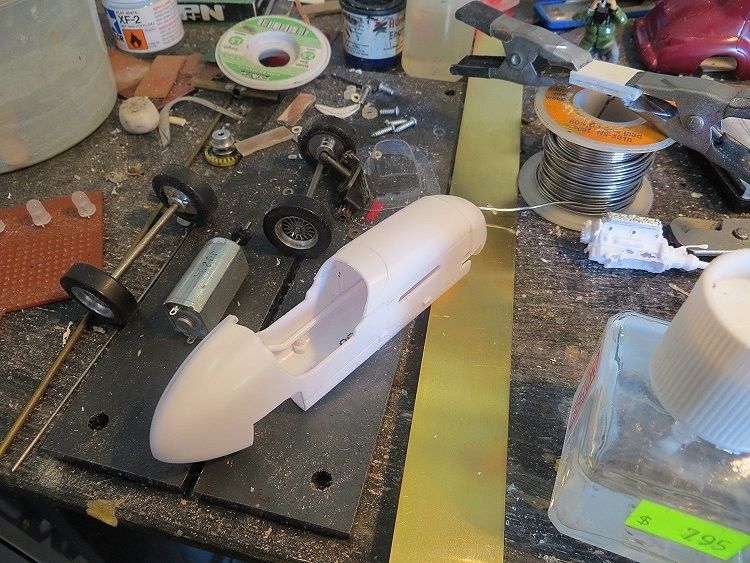
The basic body is assembled and left to dry. This will need more work once the chassis is assembled and ready to install.
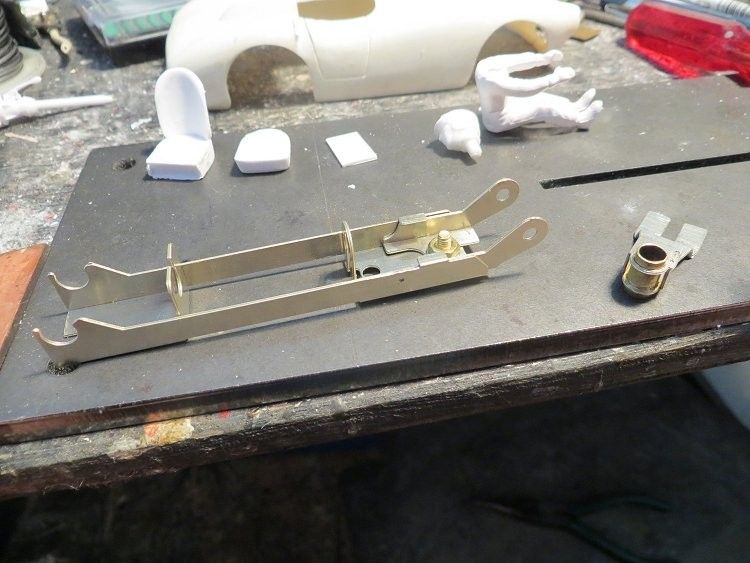
The chassis is ‘folded’ into shape, this can be precarious! The chassis is a nickel silver type material which solders amazingly well, but…. unlike stainless chassis’ it will only bend once!!! A second bend will see the part snap off, you have been warned. Also, try and bend to the correct angle the first time, as further truing may also fatigue the bend, particularly with the motor brackets. I had to modify the guide holder too, to prevent having to hack too much off the nose cone.
Tip, once all required angles are achieved, try floating a bead of solder along the photo etched grooves.
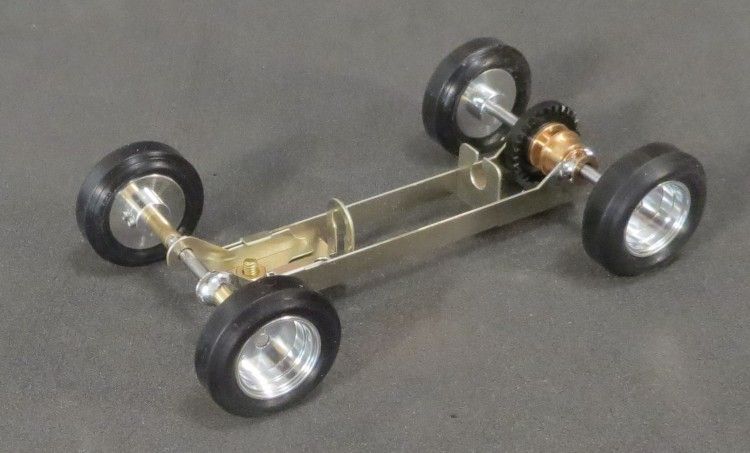
The rolling chassis with axles in place. The front axle bracket slides,allowing it to be moderately adjustable. The rear axle bearings should clip into the rear chassis; but, once again, too much bending is to be avoided. I decided to fit a couple of brass Scaley axle bushes, these I soldered in place to guarantee reliability.

There is no rear chassis mounting hole so I fabricated a simple bracket to fit to the rear, This is visible later in the review.
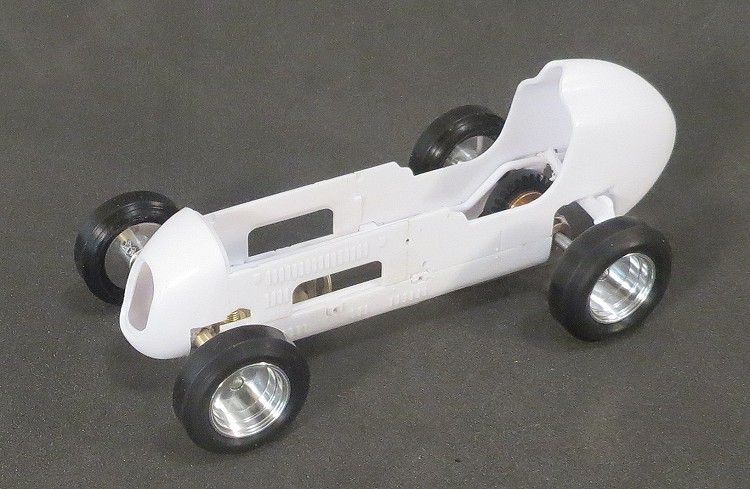
Once the basic chassis was assembled, I cut out the centre underside of the assembled body with a ‘dremel’ type cutting disc, offering the chassis up from time to time so’s I didn’t cut too much away. The rough edges were then cleaned up with some ‘wixwacing’ sanding sticks ‘til the chassis slipped in and out smoothly.
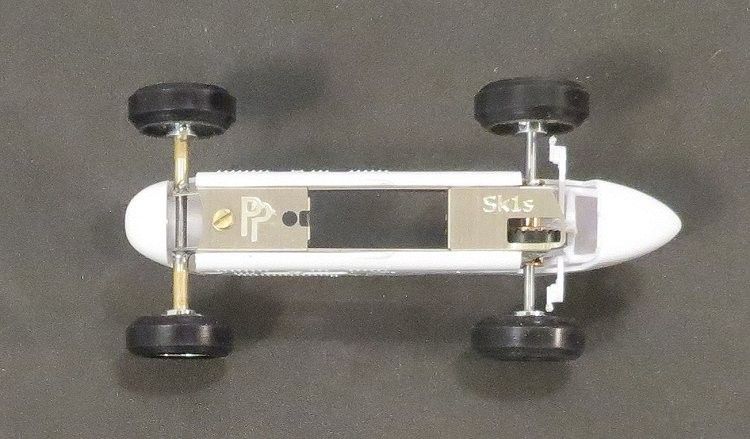
I have counter bored the Scaley rear axle bushes and soldered in two lengths of 3/32 i.d. brass tubing to add a bit more strength to the chassis. The fronts (above) were also strengthened in the same way.
The chassis has no mounts in the body, so, once again I used the ‘wixwacing’ patent chassis mounts, being lengths of telescoping plastic tube, one glued inside the other. Mounting post screw holes need drilling in the chassis and then the posts are screwed onto the chassis and the whole offered into the body; this is done trimming the posts a little at a time until the chassis bottom is flush with the bottom of the body. Posts can then be glued to the body while still fixed to the chassis.
Front 1/25th Revell Kurtis Midget. Rear, Repro EJ’s hobbies Midget racer 1/24th.
(Excuse the mess!) Don’t forget, regular refreshments are essential while you work to top up your bodily fluids, choose wisely! It can affect the finished job!
The inserts were stuck to the sticky side of some masking tape wrapped around a narrow strip of 3.0 m.m. MDF. (Bluetac can also be used). This is an ideal tool, especially for painting, I use it often. Don’t forget the spinners too!
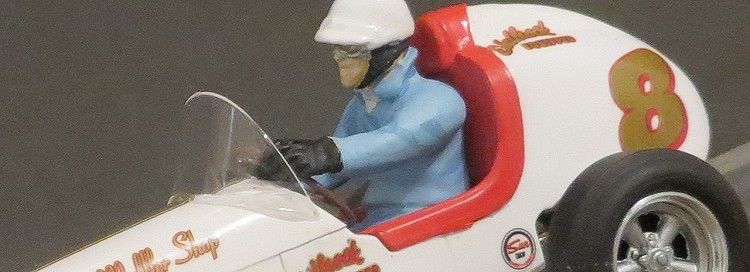
The model had a coat of flat white, visible defects body were fixed and retouched, the second coat was rubbed down with some cotton cloth and the first clear coat applied over this. There will be another two clear coats, but the decals will be applied to this first one. Once the top coat was applied, the flat items like the seat cover and dash can be painted, I use satin and flat finishes for these items.

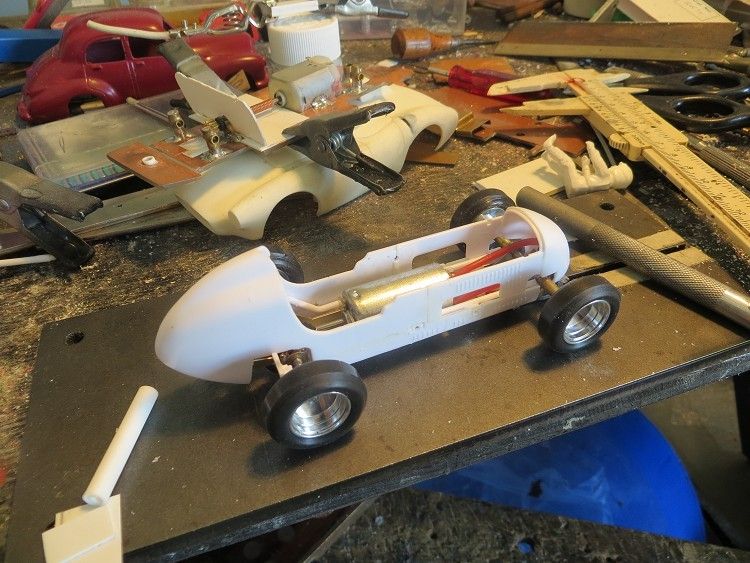
Before the seat is glued in place it has to be trimmed to avoid the motor, I trimmed the front edge of the seat until it slotted in place easily. The pre painted seat was then glued in place. As the end of the motor will be visible under the driver’s legs I decided to paint the end of the motor the same colour as the seat. This allows the motor to merge in visually with the other cockpit details
Note here that there are some brass radius rods mounted on the chassis.
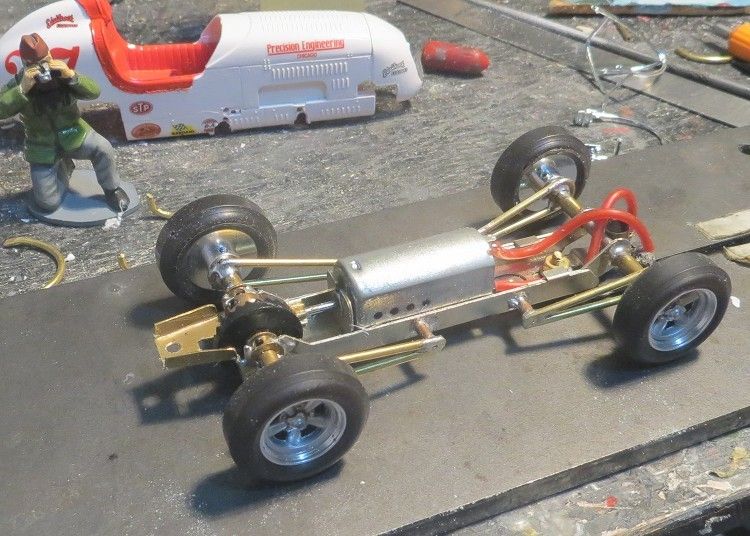
Still not happy with the flexibility of the chassis, I decided to add some braces. What I did do was fabricate some axle radius rods from brass rod. These replaced the chromed plastic links from the kit, and being soldered at one end to the axle tubes and at the other, the chassis, it gave the model a more rigid feel! The links would be painted silver a little later. Also, the links had to be spaced off the chassis by the thickness of the body! And the body needed some cut-outs adding at the attaching points. (Note also the rear chassis mount soldered to the PP chassis).
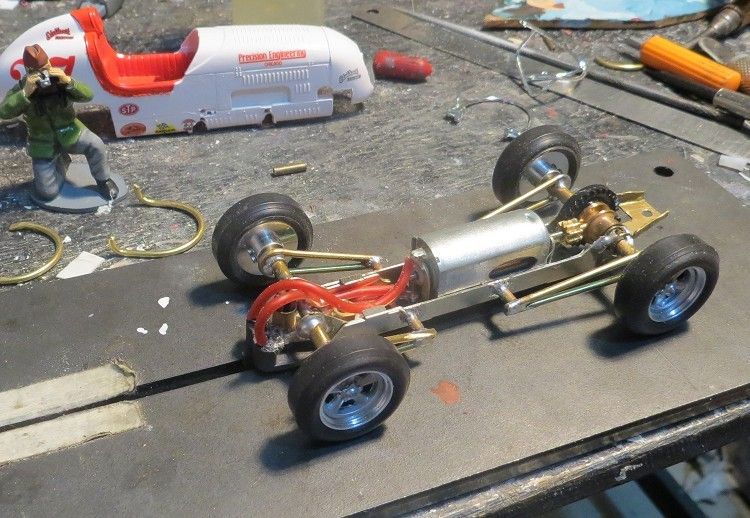
Guide and lead wires installed. The motor will get a couple of small spots of solder to ensure the motor doesn’t move in the chassis. The guide is a Ninco sport guide.
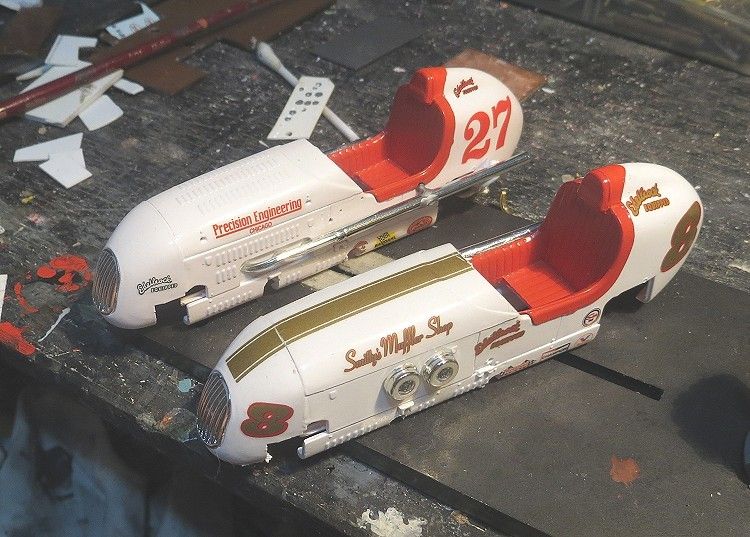
Most of the remaining decals and useable body detail are fixed in place. Nerf bars were left off (shame, I hear you say), but they were too fragile to use being thin anodized plastic. Maybe one day in the future I might revisit this feature, but not now. The extinguisher and handbrake were also left off for the same reasons.
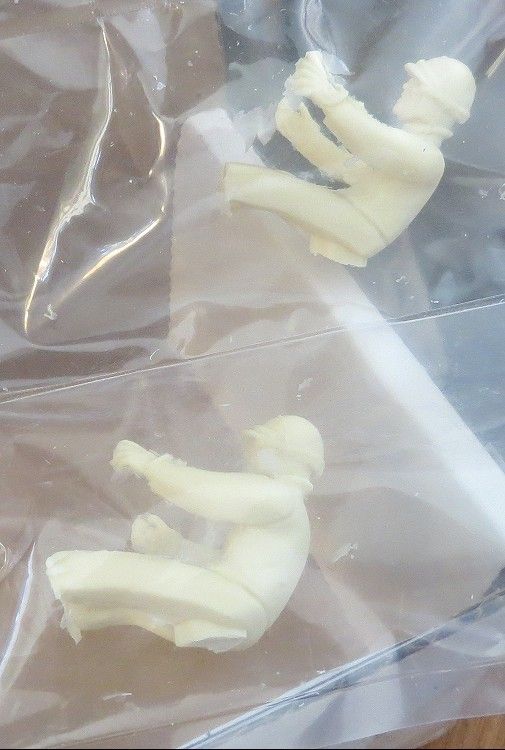
Anyone who has this kit knows that instead of coming with a driver, it comes with a trailer Mmmmmmmmm!, but, the saviour in this case is an unassuming business known simply as Jimmy Flintsone!
Jimmy Flintstone Studios
Not only do they make wonderous things in resin, they make a driver for the Revell Kurtis Midget racer! Which must be the only slotcar item they make! Check out their website. You can buy the driver from their website, or after a short search, you should be able to buy them from their eBay shop.
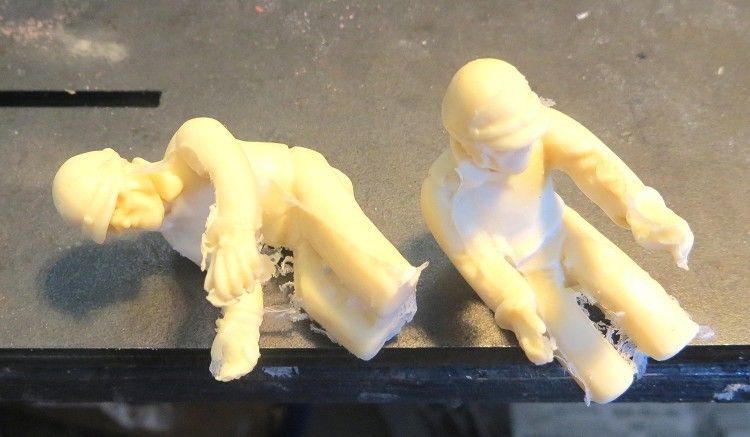
The driver figures clean up well and after a bit of underleg trimming to allow for the motor, the driver slots in very nicely in his allocated position. Remember to get all cockpit parts to fit well with each other before painting and glueing anything.
Before gluing the driver in, it is essential to get him in the right spot, or the screen won’t fit. The driver is specifically made for this model but will need a little trimming to get a good fit. I scored the driver’s back and the seat lightly before glueing, and I used superstrength epoxy to set him in place.
The glue was applied carefully to his back and to the seat cushion, and the driver dropped in place. I then tilted the model front up, this was to prevent the glue running onto the motor end. While in this position I placed the screen loosely in place, this ensured the driver and his arms were clear of obstruction.
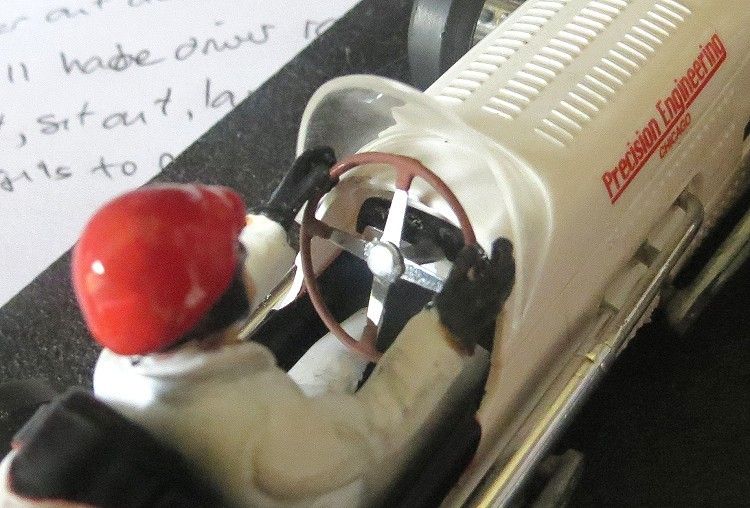
The steering wheel was the only dilemma. Normally they need to go in with the driver, but, try as I might I couldn’t get the wheel to go into its dash mount, either with or after the driver. In the end I trimmed the steering shaft by a few millimeters until I could slide it into position between the fixed driver’s hands. When all these items were dry, the screen’s bottom edge had a thin coat of extra clear epoxy applied to it and was then carefully placed in position on the model.
The anodized parts are applied after the second clear coat and enjoy the benefit of the third clear coat being applied over them.
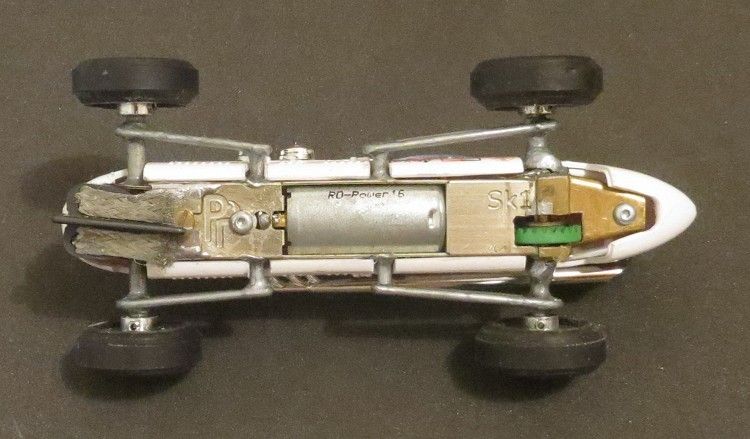
Chassis under view showing the fixing screw positions and the fabricated rear bracket. Note the radius arm mounts fitting through slots made in the body.
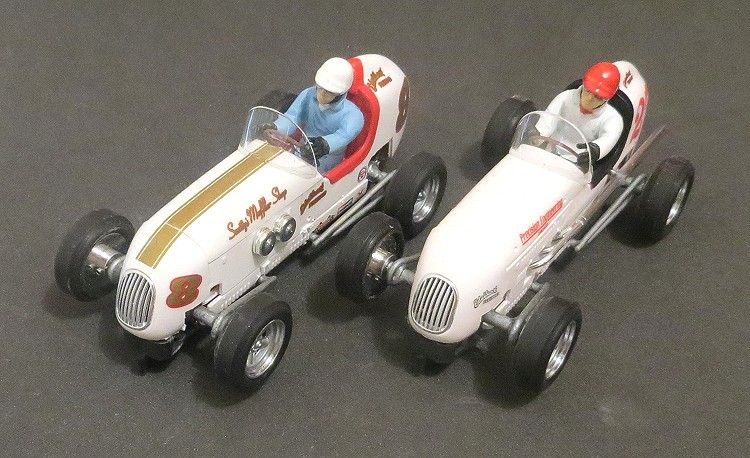
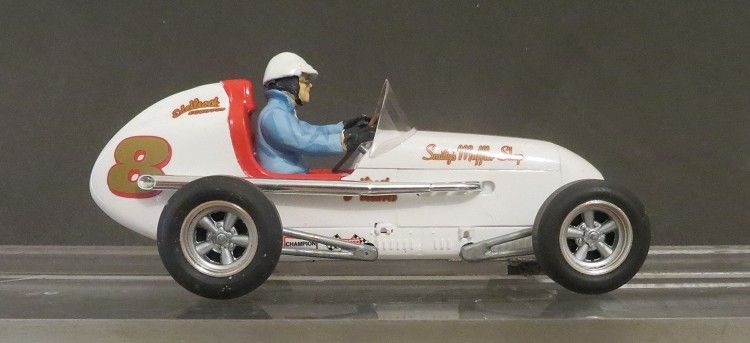
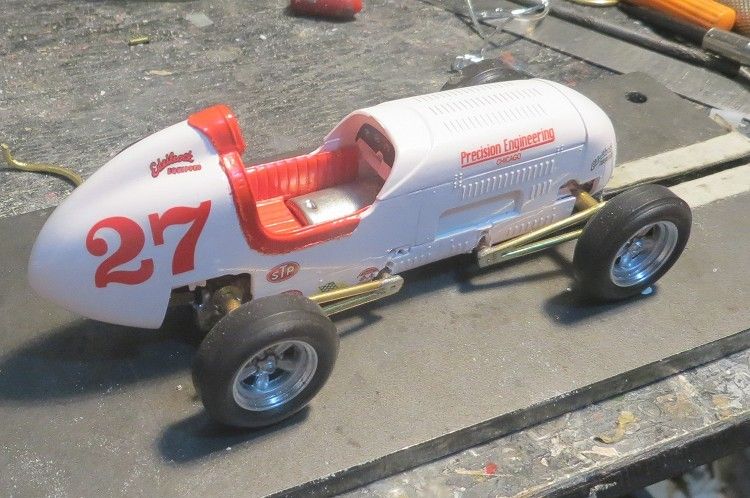
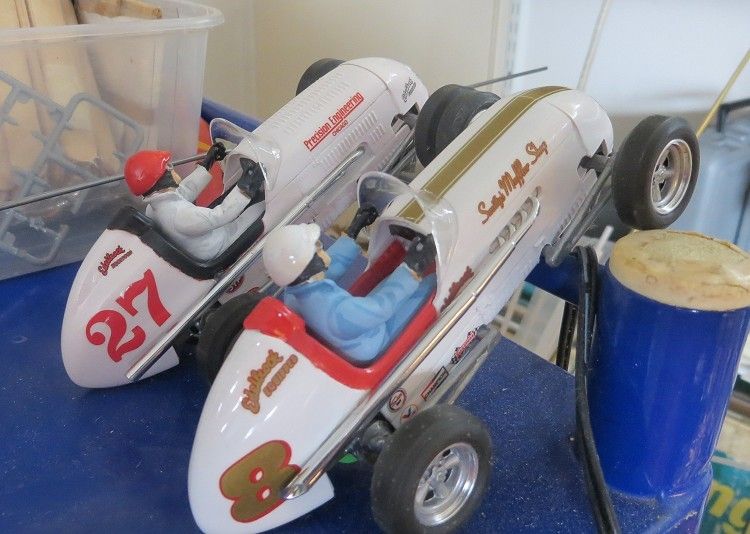
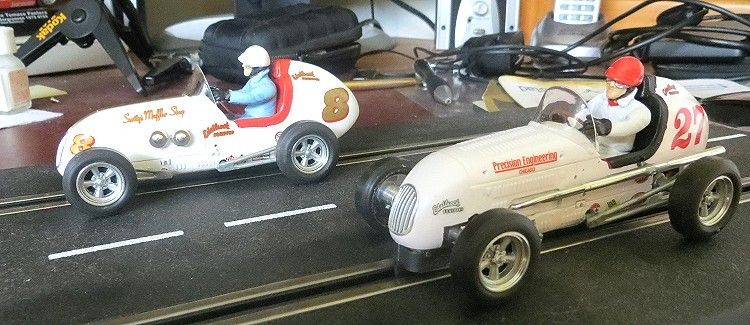
The models come in several liveries and there is the option to change features such as the front grille and nose cone. The single and twin exhaust option comes in separate kits and denotes the model has either the Edelbrock V8 or the Offenhauser four cylinder engine. The model comes with reasonable dash detail and etched metal parts, and there is also a fully detailed engine but alas, little room left to fit it after conversion. So what do you reckon, maybe the next one (if there is one) will get the works? In the meantime keep watch for some MJK additions to the genre Mmmmmmmm?
As mentioned before, the model was never intended to be a true to scale rendition simply because it has too many fragile parts, but the good news is that if you like the Classic looks of these models, and feel a bit daunted about tackling this model, check out the EJ hobbies alternatives on the web
EJ's Hobbies
Also, there is a very special EJ hobbies sprintcar with Aussie connections approaching completion on the wixwacing building bench, stay tuned!!
I won’t deny this was not an easy build for me, with time against me most of the day I was tempted to rush it and probably spoil it. As mentioned before, this was never going to be a concourse model. The fact that I built two should tell you they were primarily built for racing, so racing they will go. But don’t be put off, have a go at one and maybe you can let us know of some shortcuts to success. Following is a list of parts and their suppliers: