


renovation
by Phil Wicks
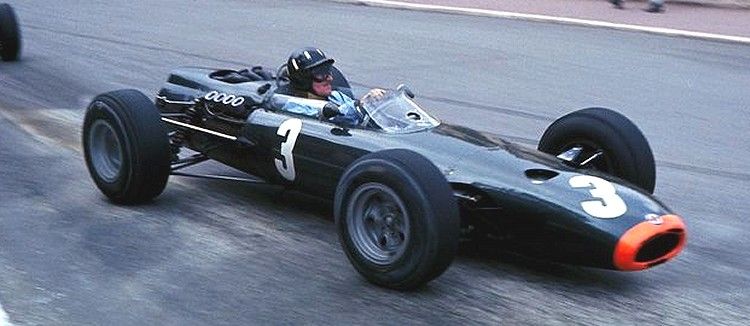
After being very pleased with the outcome of the Lola Climax renovation I have had a couple of bodies hanging about the scrap box which I have been looking at from time to time wondering what should be next! Mmmmmmmm?. I have a choice of a Monogram Lotus 33, an MRRC Matra or the BRM P261 which I eventually chose to do. The BRM appealed to me from its sleekness and what I then perceived to be the ease of its renovation. With no more ado, things like wheels and tyres and motors were ordered and work began on the rebuild.
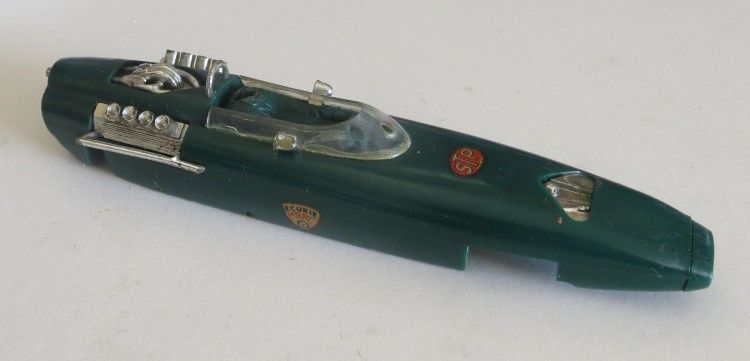
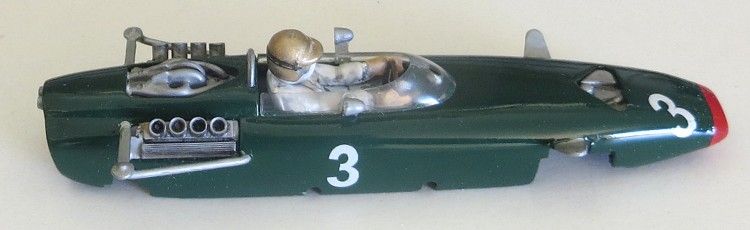
Before
Once again this model was another model to get the Wixwacing circuit board chassis, and I have come to appreciate how easy PCB can be worked if you have a dremel and a selection of dremel tools. So, the first job was to cut the chassis out. The body was placed over the board and marked round with an HB pencil. The shape was cut from the sheet using a dremel tool cutting disc with allowances being made for suspension stays and axle mounting tubes. A bit of judicious sanding and several coffees later I had the basic chassis the shape I wanted it, and now all I needed were the automotive bits I was waiting for, the dimensions of which would allow me to accurately mark and cut the apertures in the chassis material.
The front end of the chassis was marked out to take the axle posts and the guide tube, and when happy with their location, they were cut out. The axle mounting tubes were placed but not fixed in the chassis. The same thing happened to the rear and again, because they influence the model’s stance, nothing could be fixed in place until the tyres and gears had arrived! These items would also determine the ride height and crown wheel clearance. There wasn’t much room at the rear of the model, so to be impatient at this stage would see a lot of planning come undone.

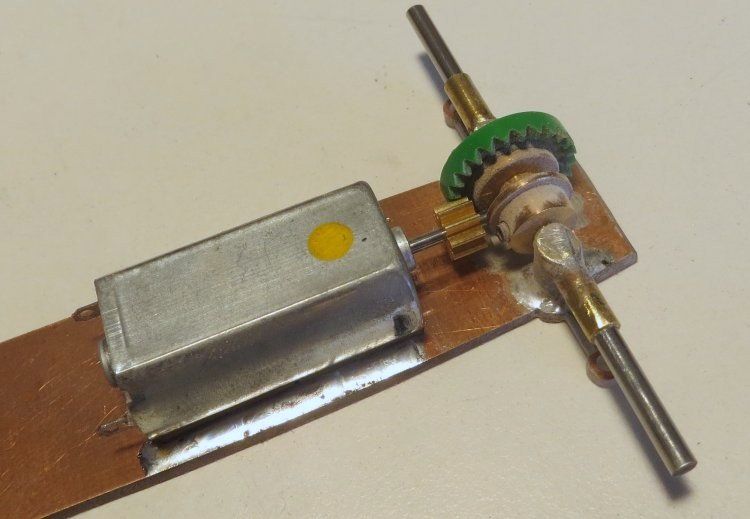
With the arrival of the wheels and tyres I was able to mark the locations for the axle posts and serious building could get underway. The motor and gear apertures were measured and cut out, and with the body sitting in place on the chassis the wheels and axles were fixed in place giving the model minimum ground clearance. At this stage the motor aperture was tinned only, as the motor will be fixed in place during the latter stages of the build.
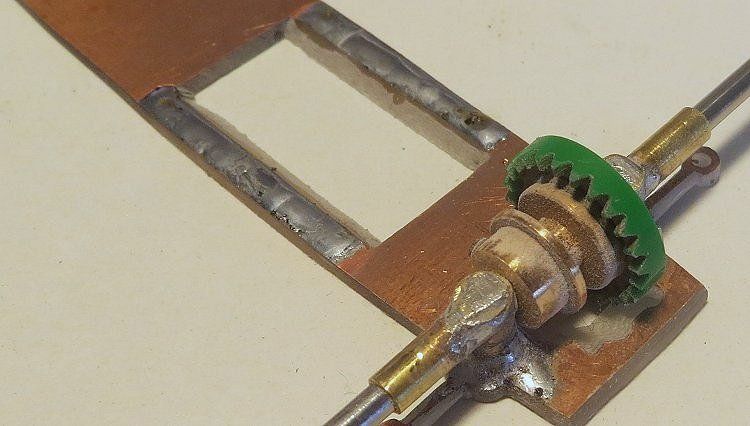
The motor is rated at 14,800 rpm @ 12V so I decided on a Slot.it 25z crown for space and a Slot.it 8z pinion. I won’t be racing the model competitively at this stage so I just wanted a comfortable final drive set up for some casual racing between events.
Once interior clearances were determined the body could be prepared for painting. Priming and rubbing back until all the blemishes were eradicated, the colour won’t go on until the body sits well on a finished chassis. No point ruining a good paint job by being too hasty!
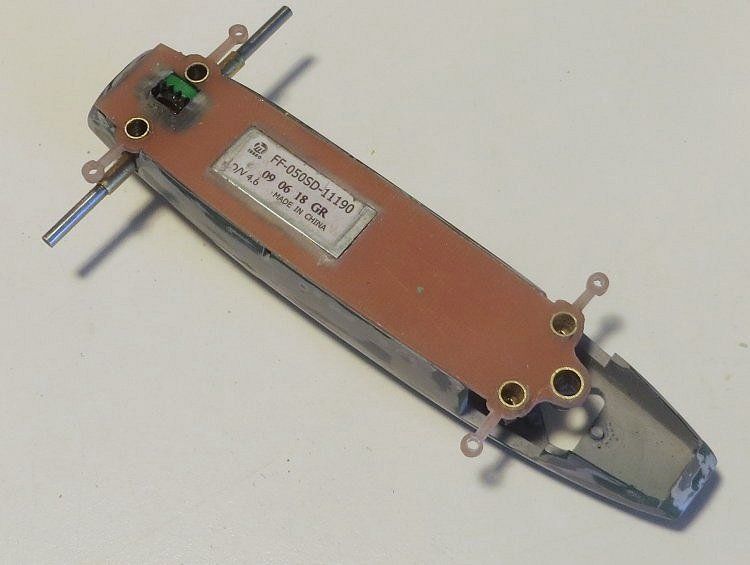
Once the axle and guide posts had been soldered into place, the opposite side of the posts under the chassis had a drop of superglue applied to them. I feel it is expecting too much for the thin copper layer to take the full brunt of the model’s activity. Before soldering them in place I lightly countersunk the obverse of the post holes. Once soldered in place I then applied Superglue to the posts were they come through the chassis. Superglue has exceptional capillary action properties and the glue will flow into any crevice it enters. Once dried I then sanded down the underside of the chassis on a flat sheet of 600 wet and dry to leave it a smooth flat finish
With the body now becoming the centre of attention the chassis can be put to one side knowing it will be a good fit when the time comes for final assembly!
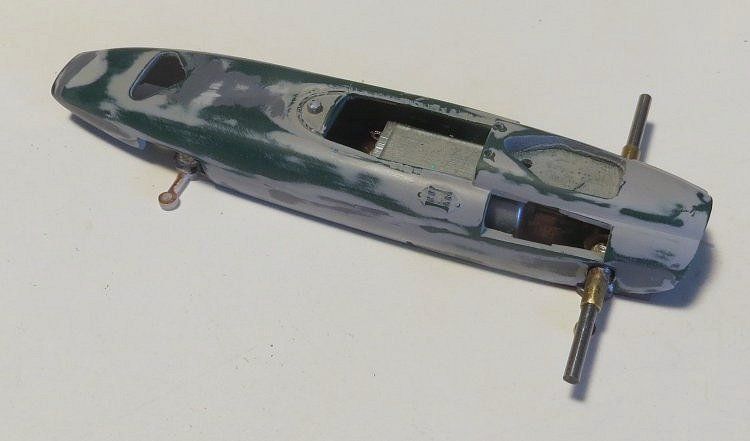
This is the body, all the chrome bits were removed and tidied up. The chrome looked too garish to me, and as some of the suspension parts will be painted, I decided to paint the chrome detail as well, so that it all matched.
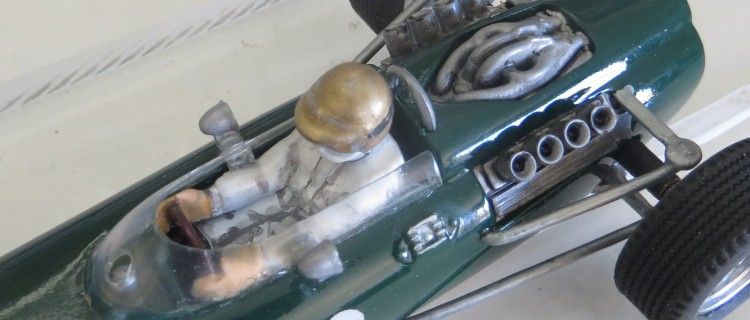
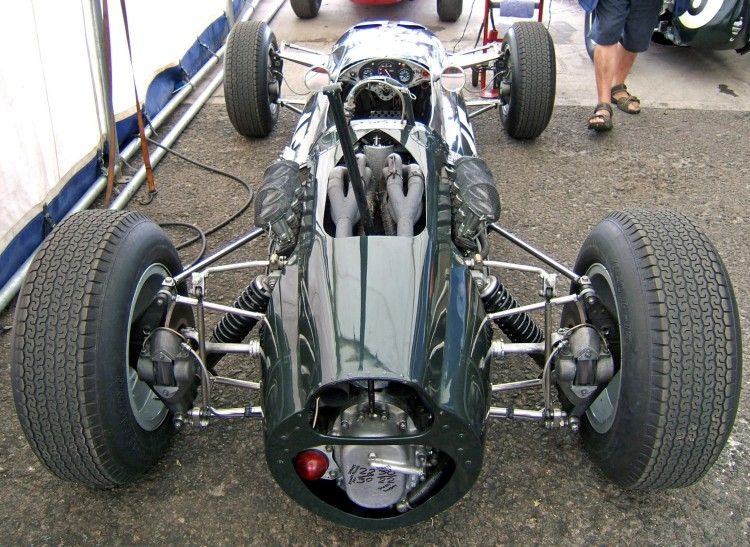
The hardest part of the build was where to put the upper suspension detail. The body comes with vestigial chrome bits at the rear but, as it had an Airfix steering unit, it had nothing else. As the picture shows, I had to create upper suspension links out of flat brass, and then glue them into place in the upper body. The hard bit was getting everything squeezed in between and around all the working parts of the model….but we did it and I think it was was worth the effort.

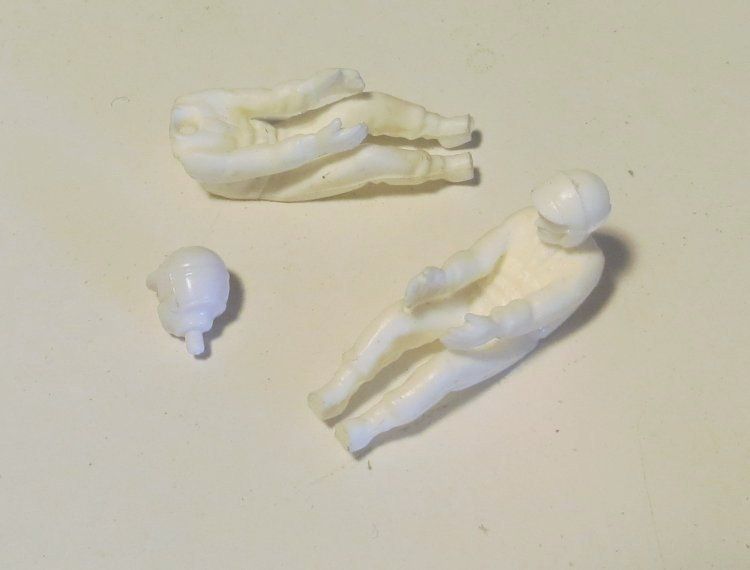
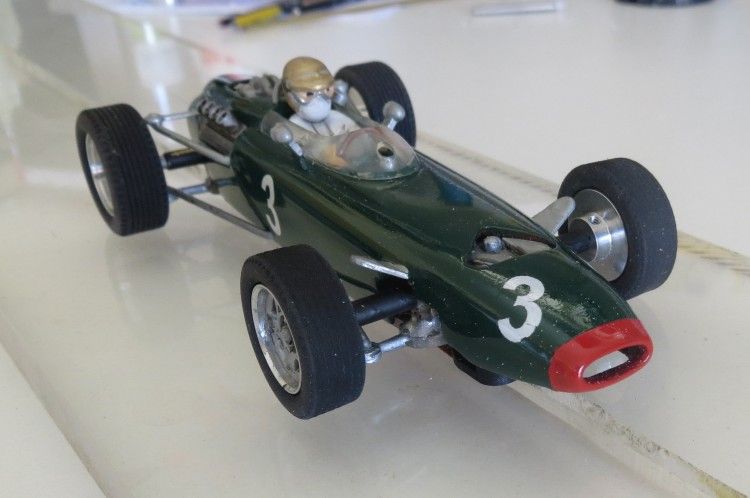
The driver figure was a part of the body moulding. It looked pretty mediocre so I chose to install a separate driver after cutting away the old one. The driver is a resin copy of some 60’s drivers and the big plus is that it has come out of a narrow cockpit model which allows it to suit the narrower bodies and consequently as you can see, is ideal for the BRM Body. As with the Lola there was no room for the driver’s legs so we had to apply some legs onto the thin plastic card glued in the body above the motor, and once again, at a glance, it looks the biz!
The screen was salvaged from the old model and after rubbing back carefully it was given a coat of clear enamel. The screen was glued back onto the painted model using aeromodeller ‘canopy glue’. This is something I have discovered recently. It is a PVA type glue which dries clear, and as such, is ideal for the job. the rear view mirrors were also salvaged from the body. These too were painted silver. I also added the luxury of two ‘bare metal foil’ mirrors onto the mirror facings. As mentioned before the chrome parts looked a bit loud so rightly or wrongly, I toned them down with some chrome silver from the auto shop. Items included suspension stays and engine detail.
The paintwork had the usual TLC applied to it and after the decals were applied, the model exterior had a couple of thin coats of clear, then a heavy coat of clear to give the shine some depth.
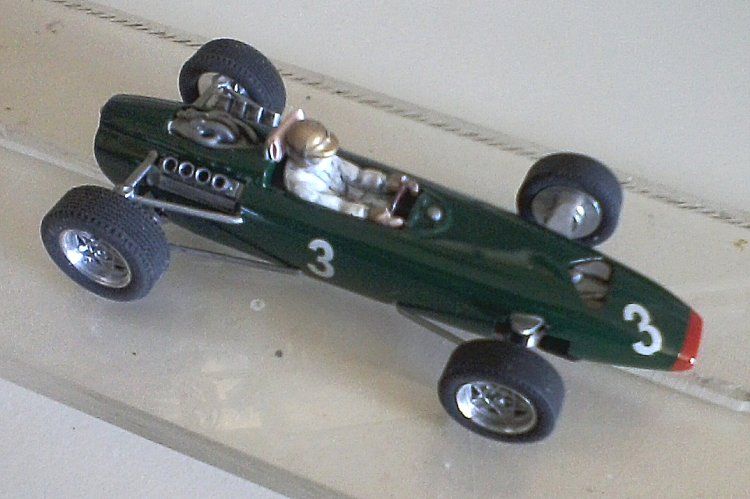
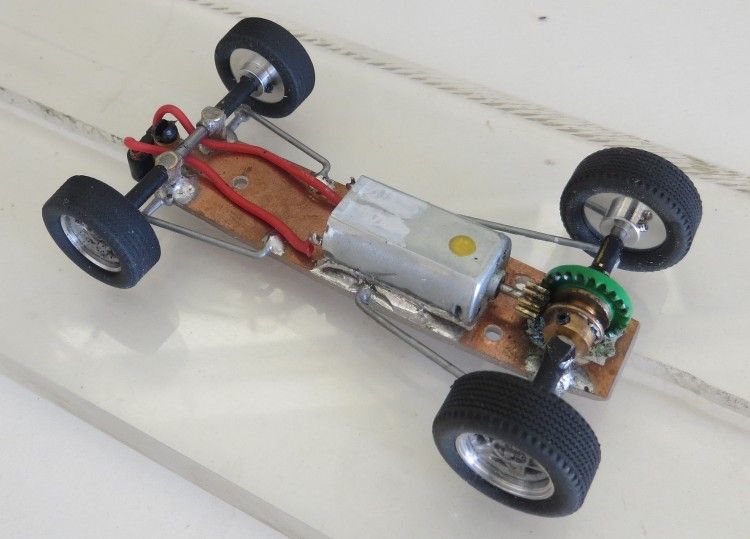
The wheels and tyres are from Pendleslot and really look the part, the only negative at the moment was that I have been unable to locate a set of wheel inserts, so, for now, I have fitted some popular wheel inserts from the era, these can be readily changed when the right thing turns up!
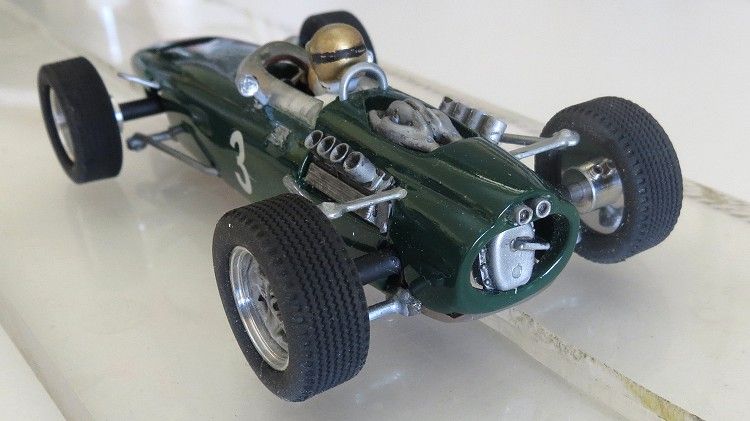
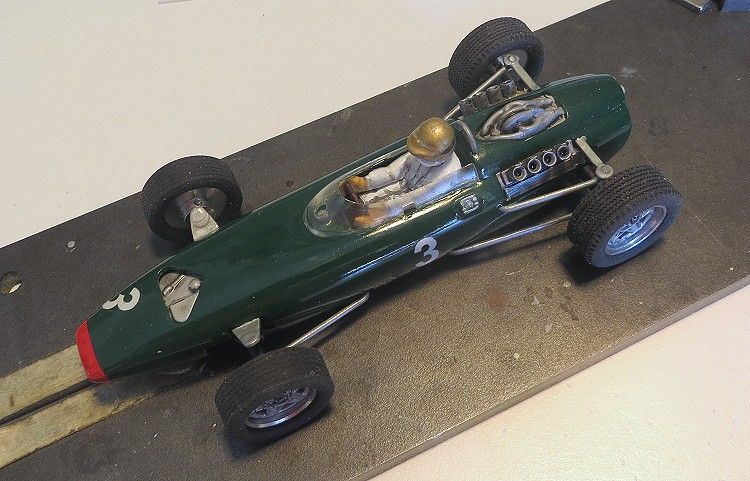
As I continually maintain, racing cars are very shiny, and likewise I always ensure my models shine accordingly. This one is no exception and its colour is vibrant!!
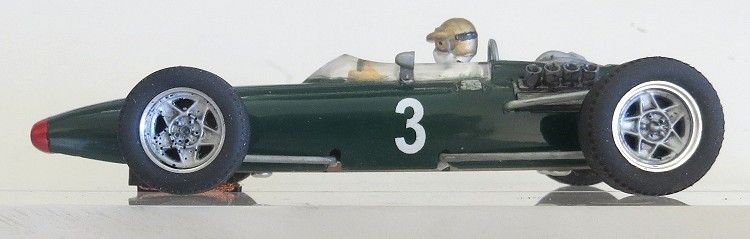
All that is left are a few laps at my local slot venue, and, as always…..I looked forward to it. At 61 grams the model is about the right weight as most other classic open wheelers. As there is not a lot of body weight, two things will need to be right. Firstly, the braid material needs to be very light as too springy a braid will lift the front of the model off the track! Also, the rear tyres are going to need to be the best available. What surface you drive on governs the tyre compound you will use, but I have found the best all round tyres to be a good compound urethane much like the secret formula MJK4214 (Classic Ninco) tyres made here in Aus!
Finally a spin on a track somewhere will tell me if we have succeeded! With the model on natural rubber tyres and track surface being painted non magnet we took to the piste! Driving off showed the braids needed repositioning but once achieved the model ran particularly well. The only remaining task was to true the tyres as, although they are very attractive tyres, they do need a short spell on the tyre truer as a final touch. This done, the model was replaced on the track again and a few progressive laps were achieved.
All in all a great little model which beggars the question, will I ever race it in anger?? Well, if there are a couple of geriatrics on the outside lanes and a seasoned racer beside me in the middle then I might give it a go. One thing you can appreciate with modern RTR slotcars is the paint job. Not only are most models scratch resistant, they take most racing incidents thrown at them with ease. The scratch build requires a good (not too thick) enamel coating to be fairly mark resistant, but the fact is it will chip and scratch more readily than shop bought models.
So what’s next? It’s off to the toy box to see what is begging for a new paint job! And there is a half built ‘C type’ waiting to be finished!!
